
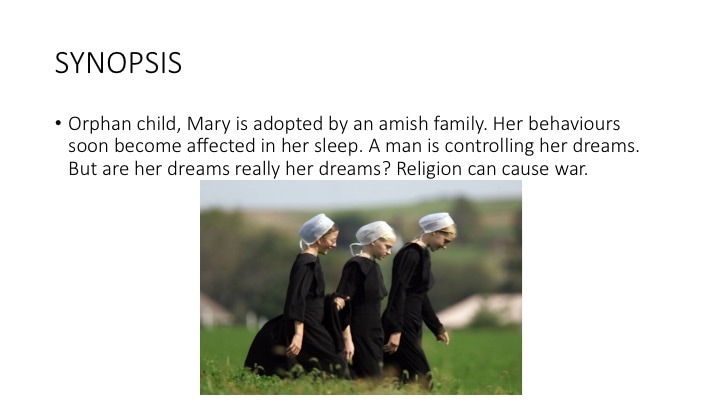
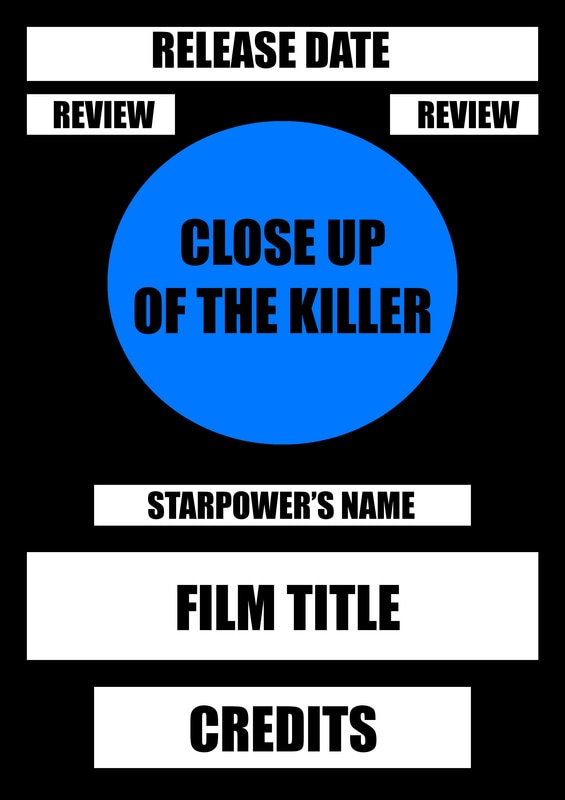
"How did you use media technologies in the construction, research, planning and evaluation stages"
Question 4 of the evaluation is all about acknowledging the media technologies we used during the construction of our Final Pieces. The use of the different media technologies was became one of the most important things to enable us to finish any task given to us to the best of our ability. We will be covering the media technologies used to the construction, research, planning and evaluation stages to creating our horror pieces in the most visual way possible.
RESEARCH & DEVELOPMENT
|
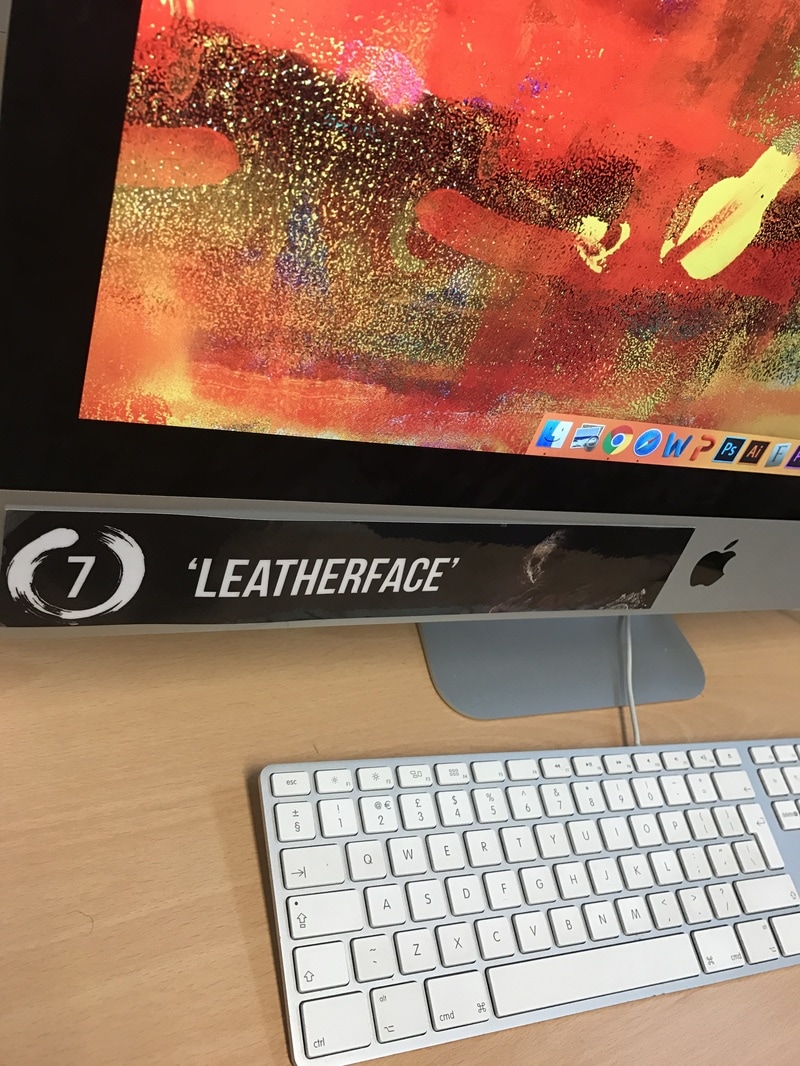
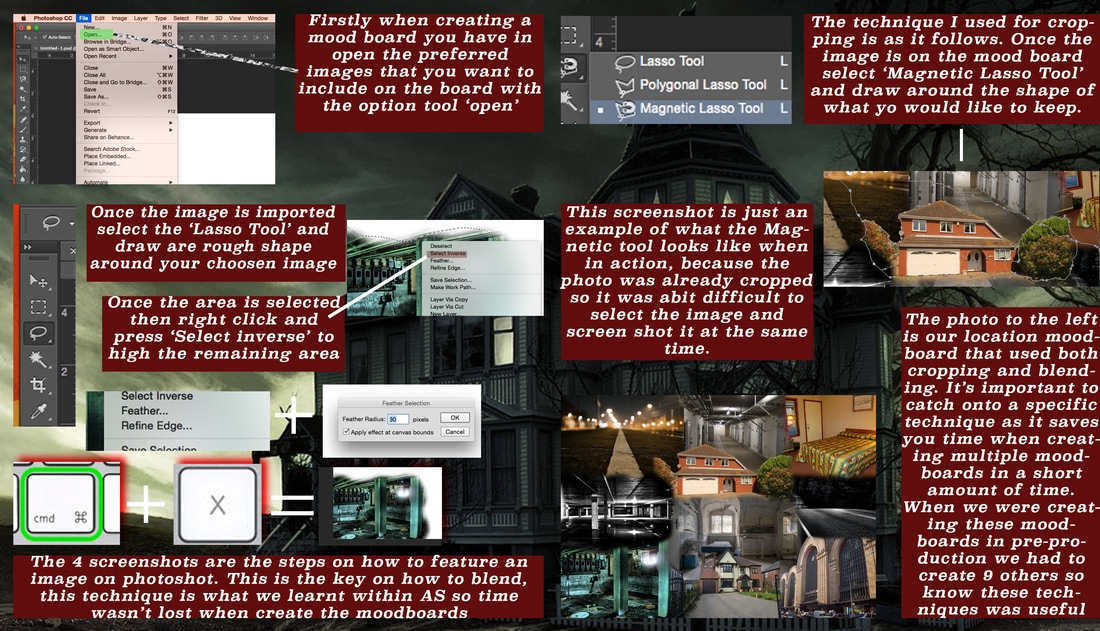
'LEATHERFACE' was the main IMAC assigned to Visionary Pictures at the beginning of the project and has helped us store, create and complete all of our work that is shown on our website. Without the use of the apple mac the construction process probably wouldn't of been an enjoyable one. This apple mac, although it was slow at times, held all the media technologies used. All the softwares used were all updated to the latest and with that advantage we had the ability to use them and create fantastic pieces within development, preproduction, production and even the evaluation.

|
SUMMER WORK
|
|
|
|
|
|
Hannah and Shannon both used IMovie to create their summer horror trailers. Using IMovie challenged the both of them as they had never edited before hand. This gave this a feel of how editing their horror trailer may be as neither one of them have access to adobe premier at home. With use of youtube clips they were both able to show their new learnt skills through the quality of their trailers.

The website technology of YouTube not only enable us to learn how to use the new software of IMovie but it also allowed us to upload our work and access it so that it can be view on our website .
|

|
|
|
Ana and Toni decided to create movie posters using Photoshop. The use of photoshop enabled them to use a variety of different tools to manipulate and create their summer work
|

|
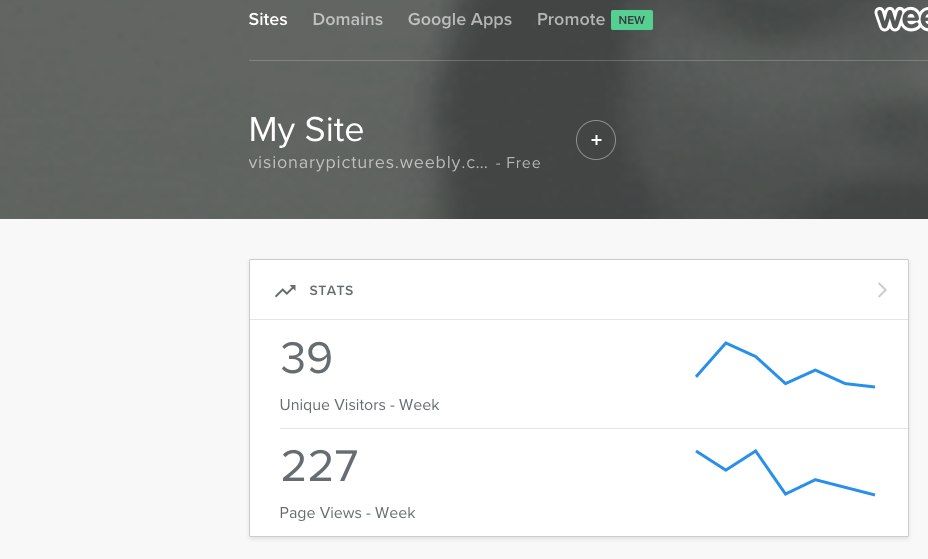
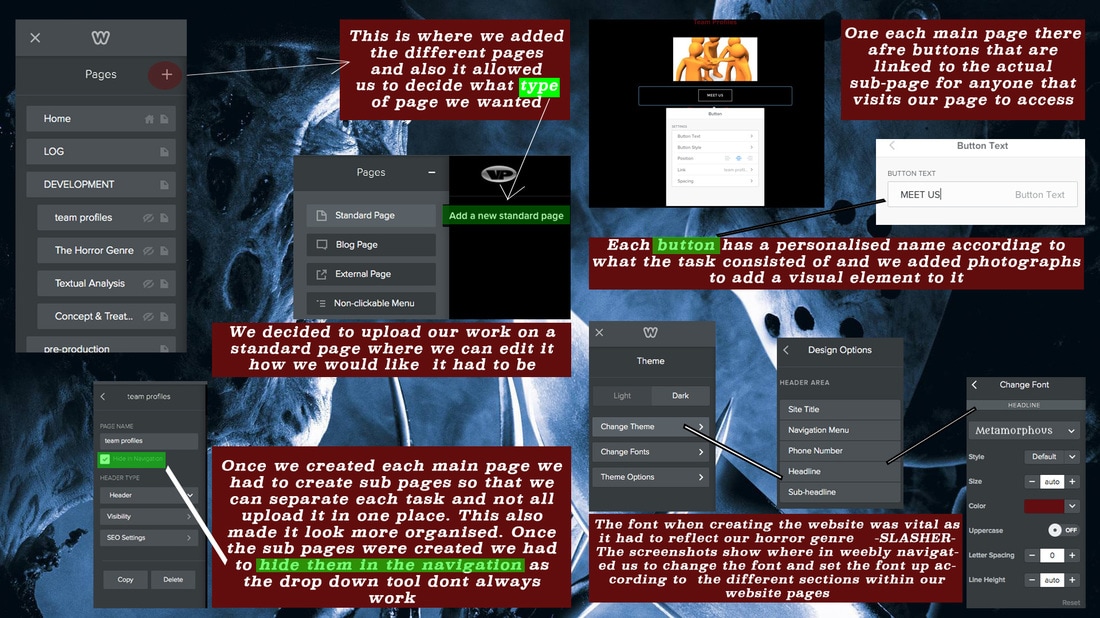
The first media technology that we used at the beginning of development of our horror pieces production was Weebly. This website technology allowed us to display our work on one site in an orderly manner. Weebly also was password protected so we were the only people within our group that was able edit our website but any one, any where, at anytime could visit our website and we were able to track how much people visit our website.
|
|
|
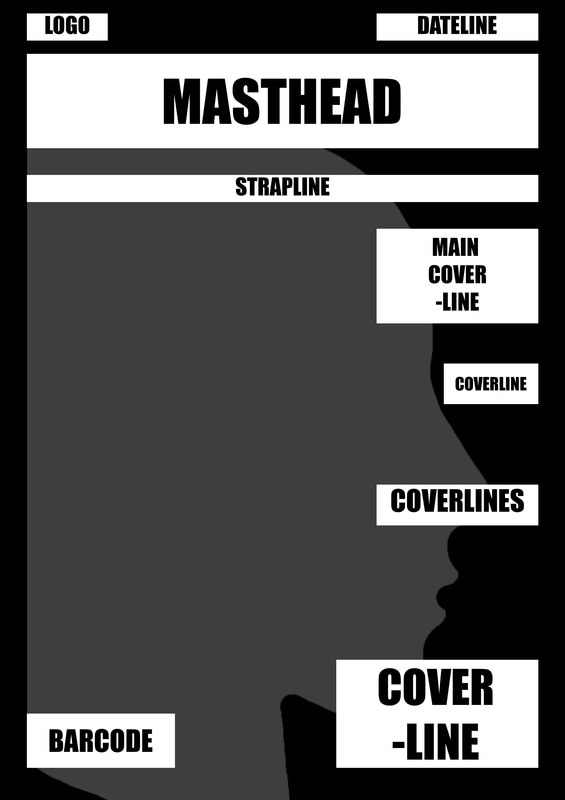
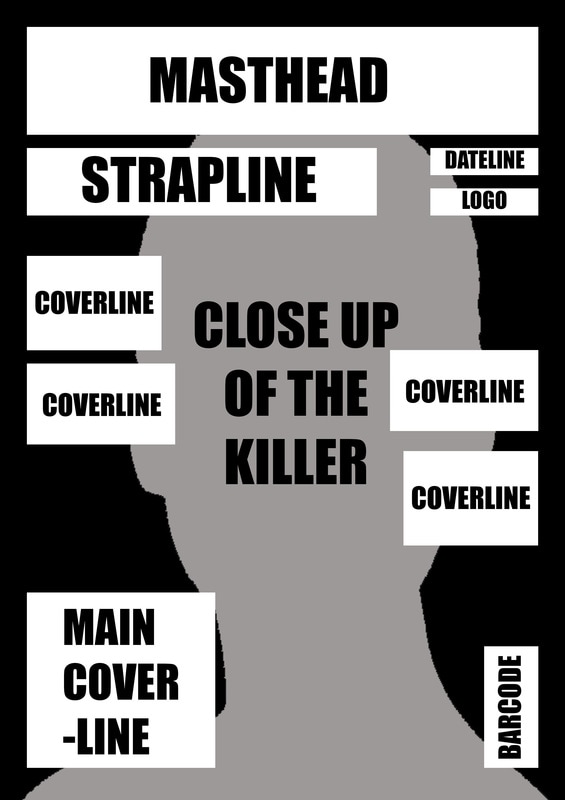
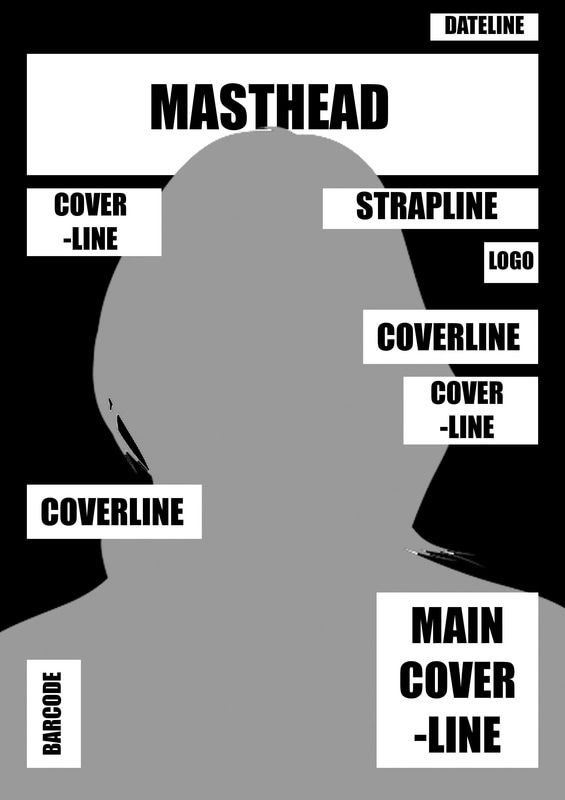
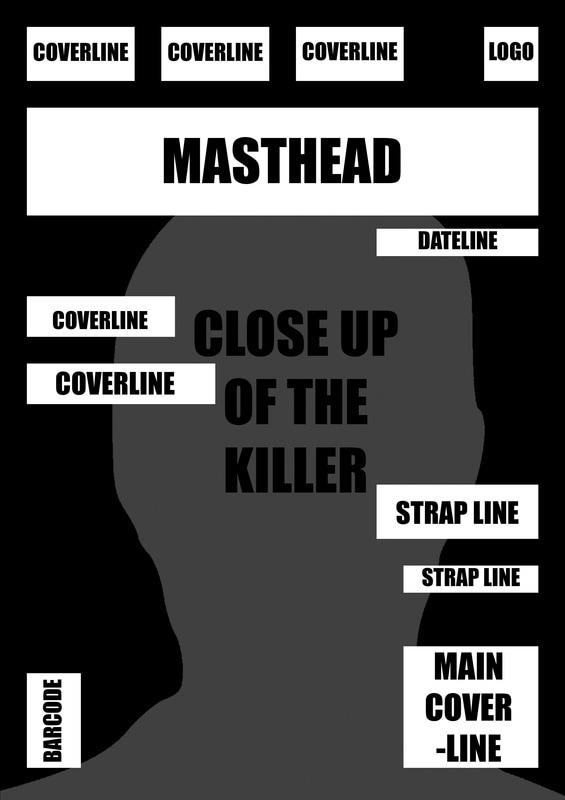
The convention above shows the different features that built our website up from the bottom to what it is now. The different sections are exampled with detail within the actual convention
|
|

|
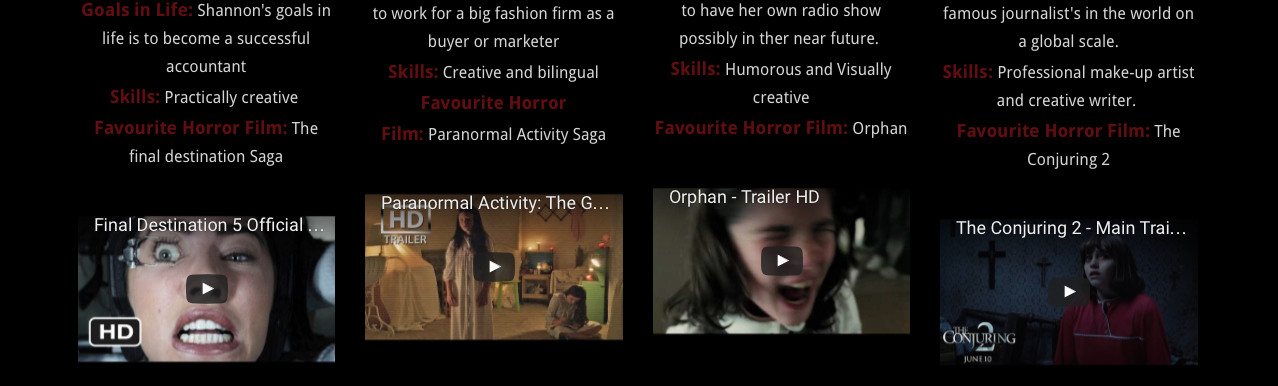
Within development YouTube was used to to collect visual elements to each team members profile of their favourite horror movies. This also showed that we had experience of watching horror movies before the project began.
|
|
Within Textual Analysis youtube was used as we each had to analysis a trailer and discuss the Mise- En-Scene, Camera and Editing, Typography, Mood and Styling, Sound, Location plus the Narrative. Along side this we had to research all the basic information about the trailer and how was involved in the creation process. These trailers where supposed to be different from the trailers we decided to be our favourite as it challenges us to look out for everything rather than what we know from our knowledge.
|
|
|
|
|
|
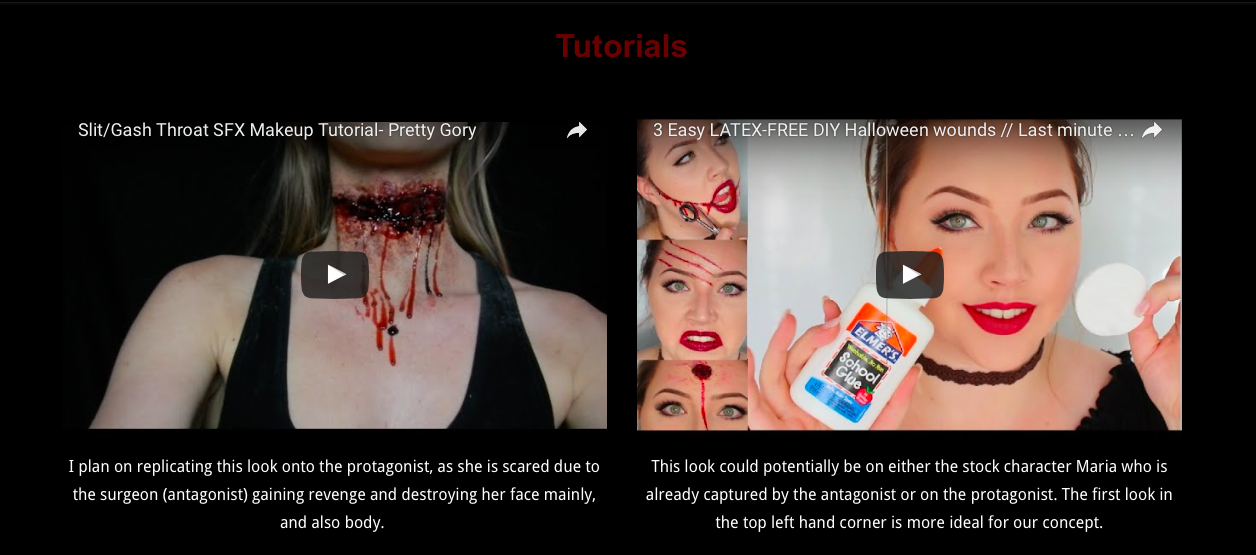
Whilst doing the costume and makeup task the use of youtube our lives revolved around watching millions of different makeup tutorials of how to use latex undercut wounds as it was our first time doing so.
|
|
|
Overall Youtube was mainly used on other sections to gather our inspirations for our horror trailer within pre-production and production. Youtube was also used to upload and visual videos that we created ourself in the process.
|
|

|
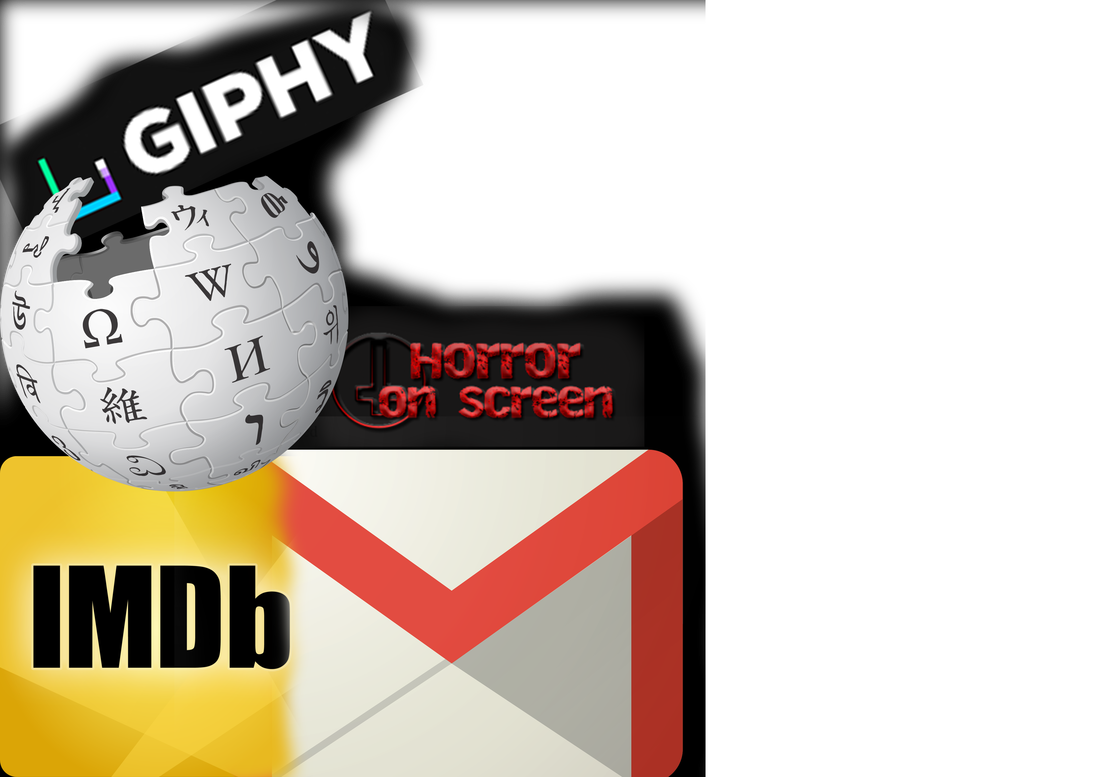
Google is a the search engine that saved our lives through this project. Not only did it give us access to majority of the images used on our website but it also gave us access to other information sites such as wikipedia, IMDB and many more. Google is also who we decided to create our email address with in the beginning of the project because then we would have to make a second youtube account to upload our work as it is linked.
|
|
|
One thing that we always done to make sure the images we got from google was of high quality is ensuring that we selected the large image size when searching for an image. Although this made it harder for us to find pictures, we were persistent and didn't give up if we couldn't find the specific picture and would just alternate between what we could find of high quality.
Not only did we collect images for google but we also used the images to influence us when taking our own images for our poster and magazine. |
|
Giphy is the site that we mainly used when collecting any gifs for our website. The reason why we used this is because the gifs are always of a high quality
Gmail is what we used to set up our email and share any work within the group. The reason for this is because the file sharing size is larger than Hotmail or Yahoo. Also Youtube is connected to gmail so we didn't have to create a separate account to upload any of our clips. |
|
|
|
Above is a moodpboard of all the sites we used that we have to go through google. It also consist of some of the sites that we used that were new to use when starting the project but with the help of google we got used to them
|
|
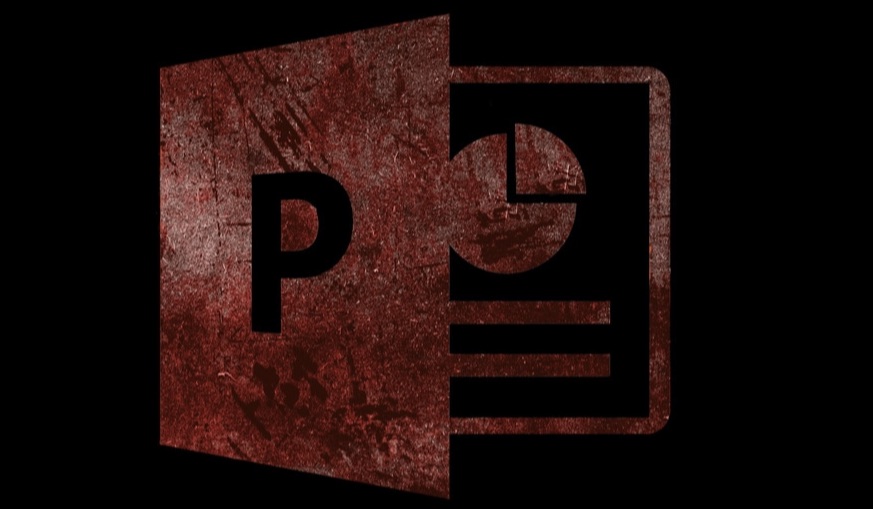
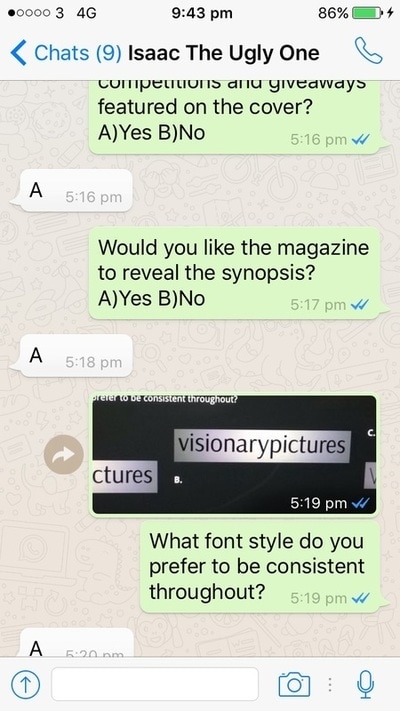
Powerpoint is apart of the Microsoft office family and now apart of ours as its journey began with us in the horror genre when we used powerpoint to show all the different iconic movies and to show all the research we did in our transition packs. Powerpoint was also used when displayed our concepts to our peers in the form of a presentation to enable them to decide which concept they like they most.
|
|
|


|
|
Powerpoint gave us a different media technology to display our work instead of doing everything on an online presentation like prezi. It also allowed us to take it back to the basics and be authentic
|
|
PLANNING
|
|
|

|
|
|
Photoshop was one of the most visual softwares we used to create our mood boards, print design and also our final poster and magazine. With experience of using photoshop in AS it gave us a head start as we didn't have to waste time learning the basics all we had to do was widen our skills to create work to a high standard
|
|
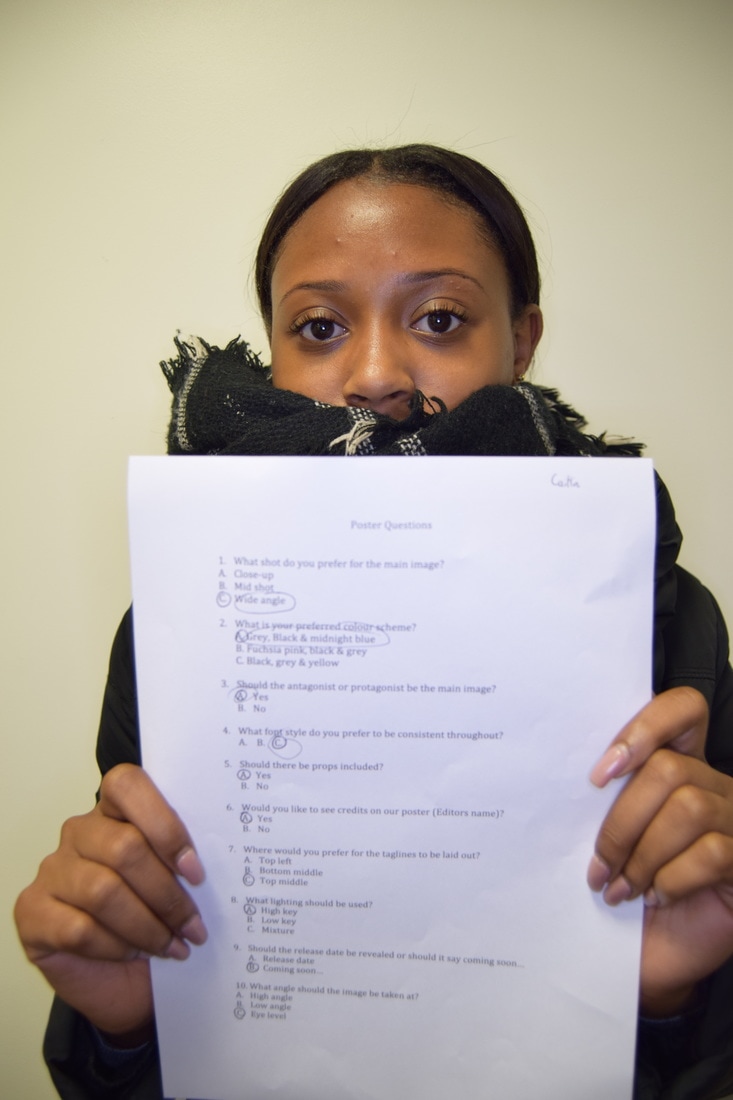
The different technologies used for audience research
|
|

|
|
|
The software's above were both used during the stage of Audience research. The use of different platforms showed that we are aware that to get a variety of a fair amount of response we have to use a different range of platforms.
|
|
|
|
|
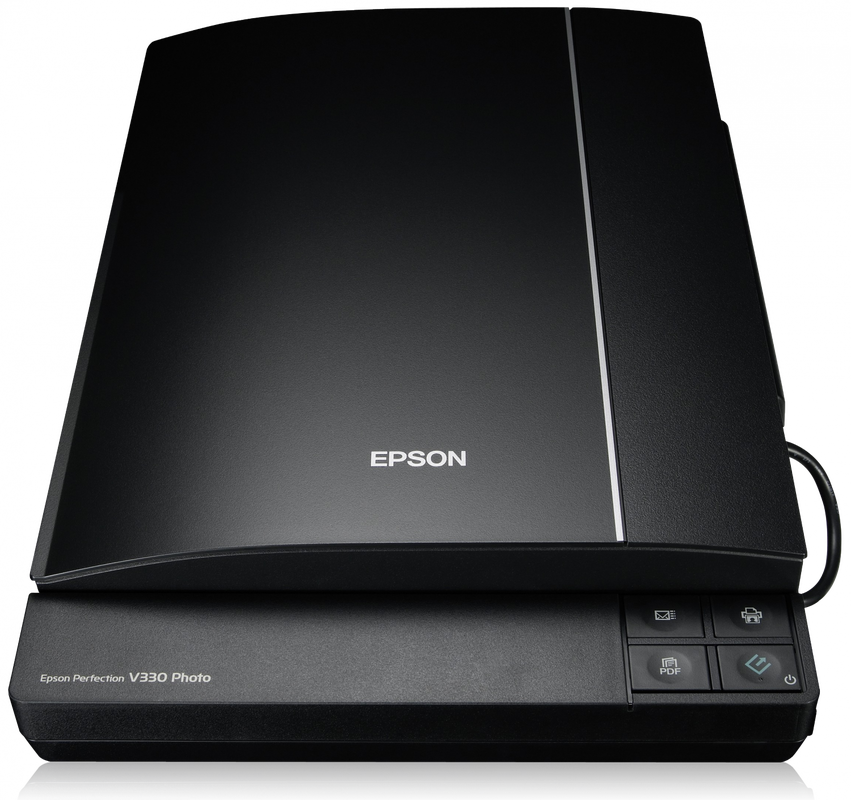
The Epson Perfection scanner was used when need to scan in any piece of work to a high quality when uploaded to our website. This included piece such as drawn drafts, artwork, location reece and any other feedback.
Art work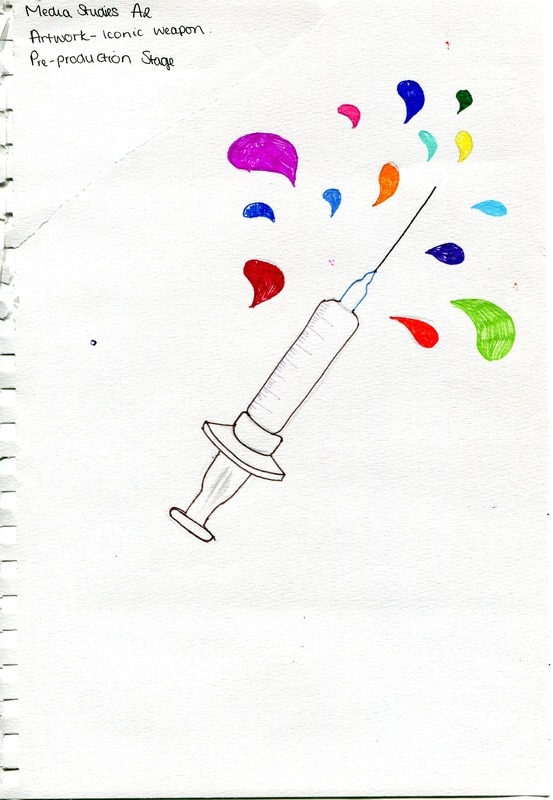
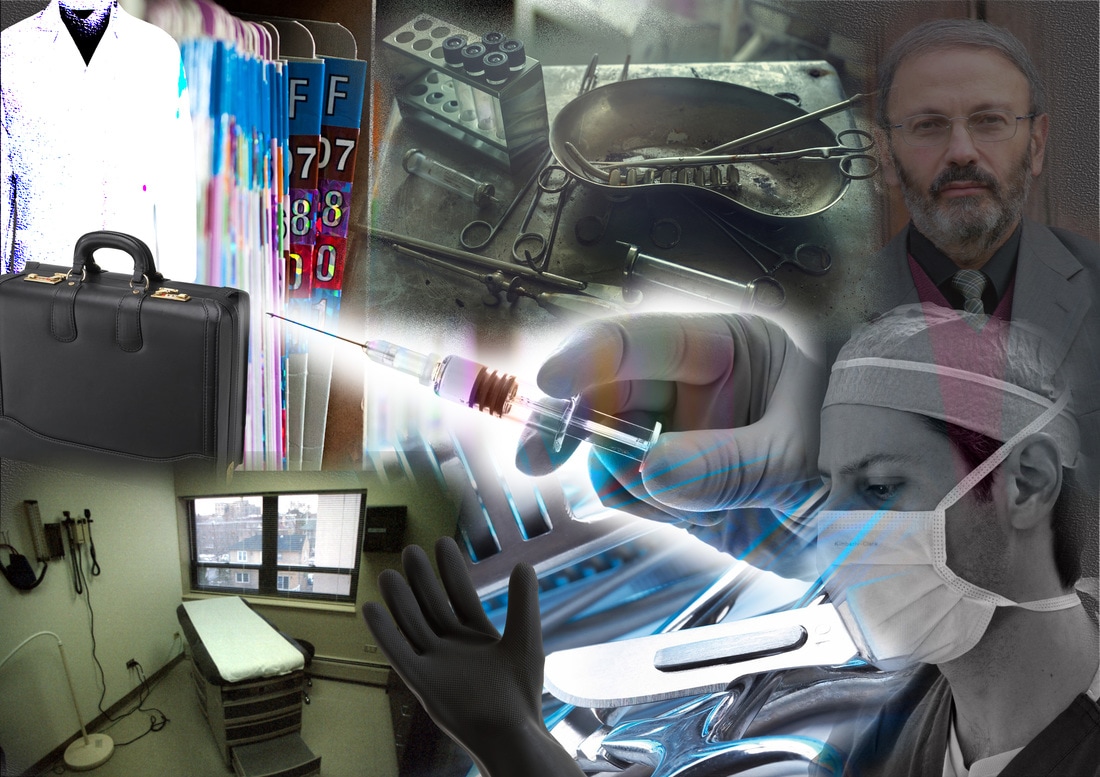
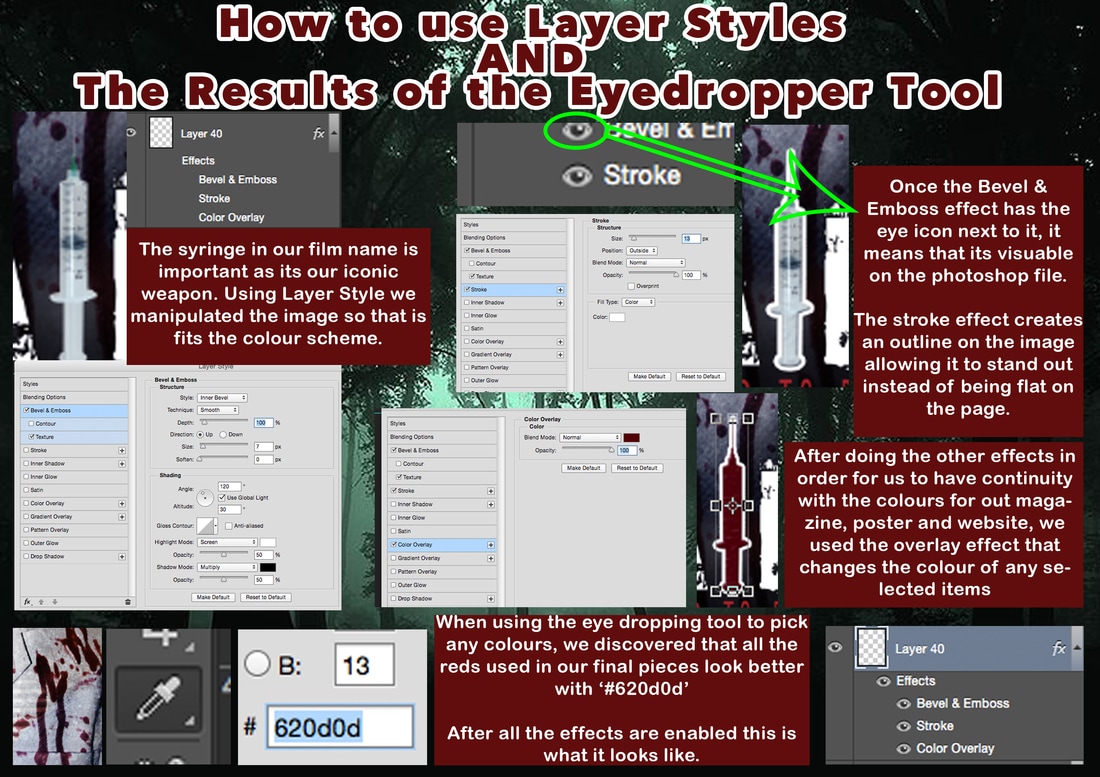
This piece of art work was drawn in the pre-production stage of planning our ideas and as we decided that the iconic weapon would be a needle it was ideal that, that was one of the art works.
|
Call Sheet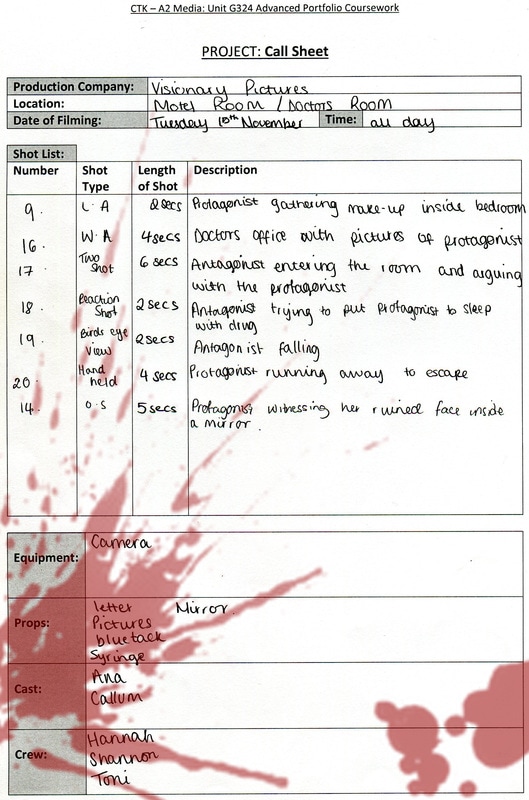
The call sheets were used when doing the Location and shooting reece. The call sheets included the information about the different shots, time scales and a brief description of the specific shot. This was done for each location so that there was no confusion of the shots on the day of film.
|
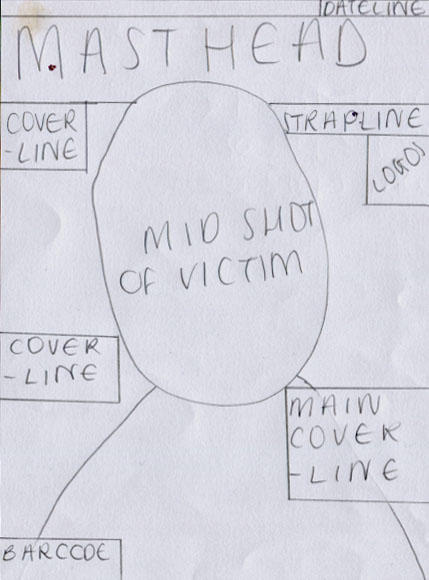
Drawn Drafts
Drawn Drafts were a part of the print design process. In order for us to have a brief idea of the layout of our magazine and poster we had to have the drawn drafts to then turned into digital for us to physically use when constructing our final poster and magazine.
|
Drawn story board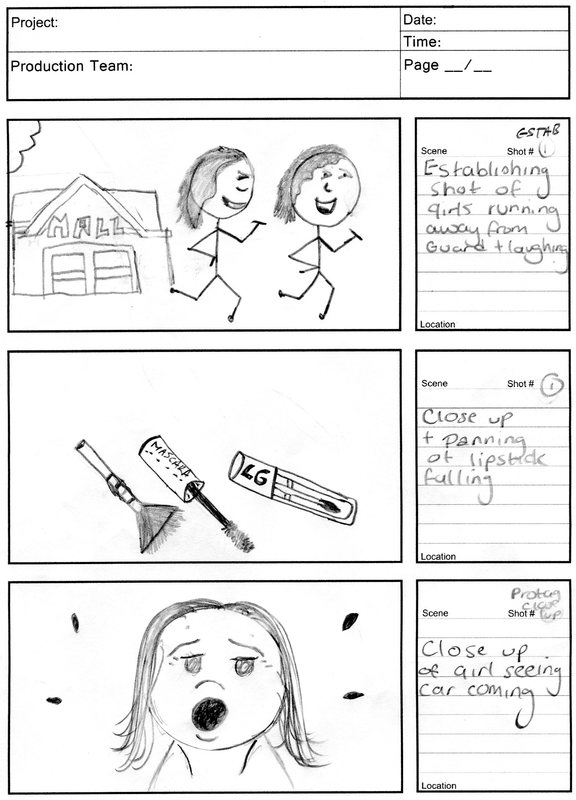
The story board once drawn then had to be scanned onto the mac so that it can be used to create the animatic which was used as a template once all the shots were taken and ready to create our trailer
|
Location reece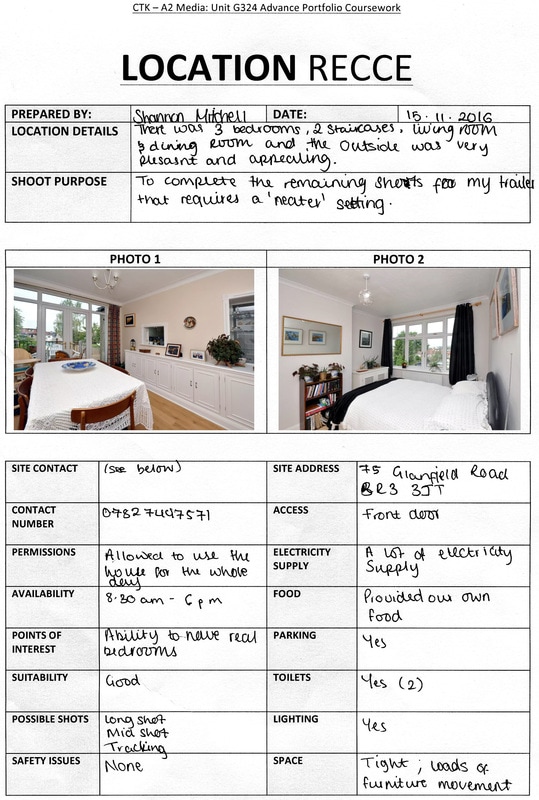
The location recce was created for every location used when the process of filming our trailer. This recce consisted of the key information such as permissions, contact number and points of interest to show that it had a purpose to our trailer.
|
Feedback sheet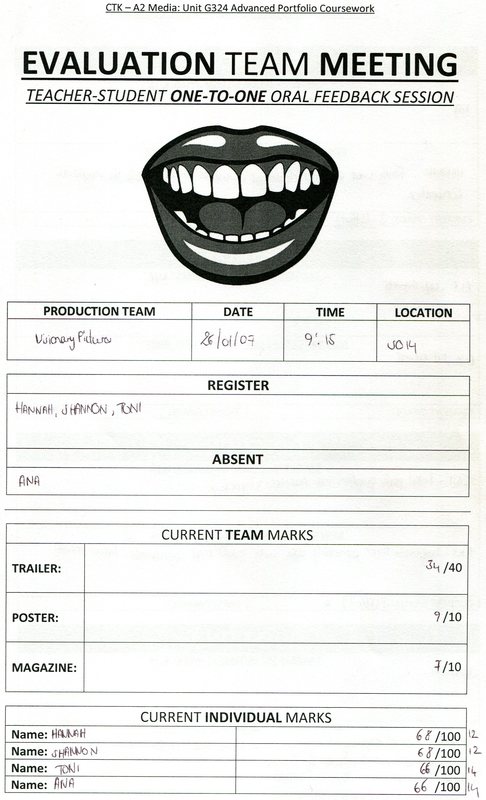
The feedback sheet had to be scanned in so that any group member could refer back to it at any given time without having to ask around for it.
|
TUTORIALS
|
|
This is a tutorial created on adobe premier pro. The reason for this tutorial was to show that before the day of filming we had knowledge of how to create a wound so that our makeup for the protagonist and stock character was perfect. It also shows the process wasn't simple but we was able to figure out a way that didn't take up too much time on the day of filming.
Although we will have a detailed introduction for premier we felt that using it before hand to edit this tutorial will give us an idea of using certain features on the software. |

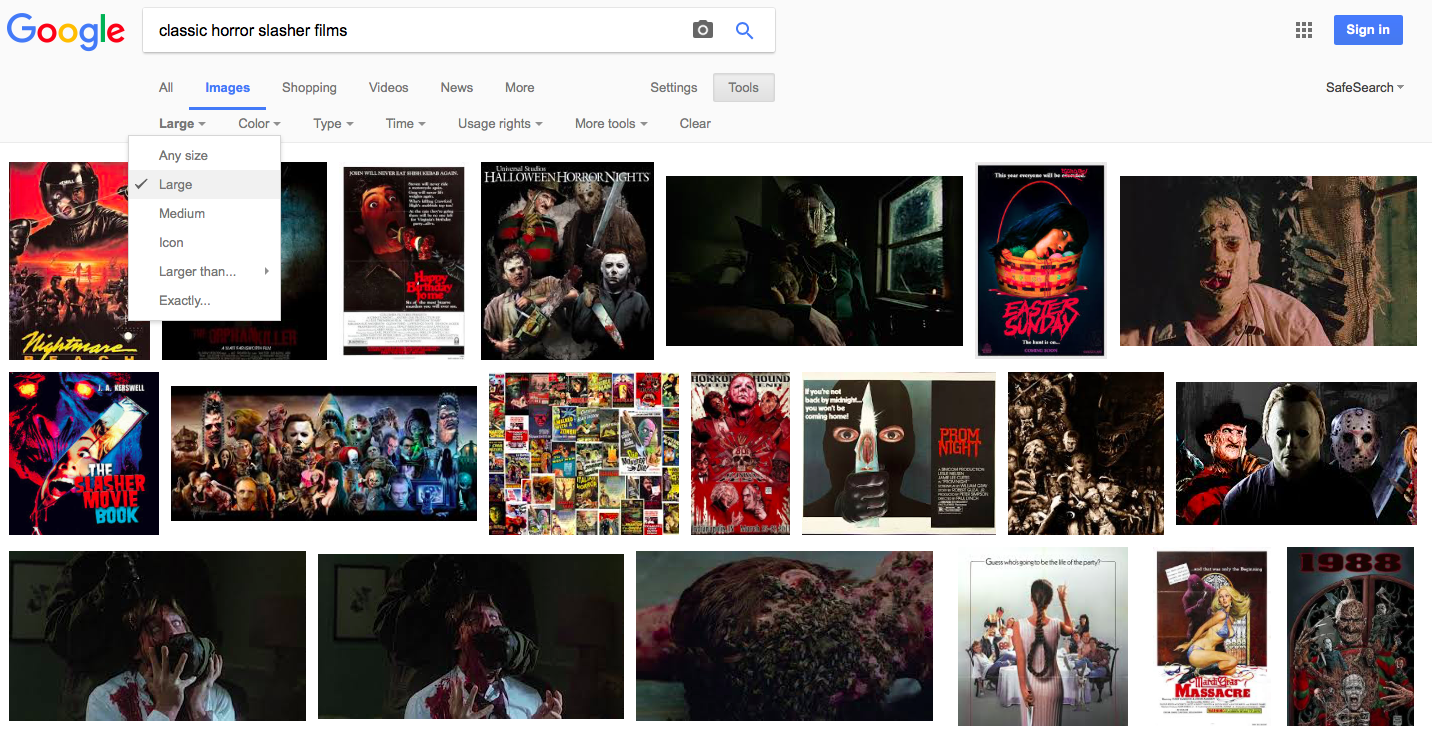
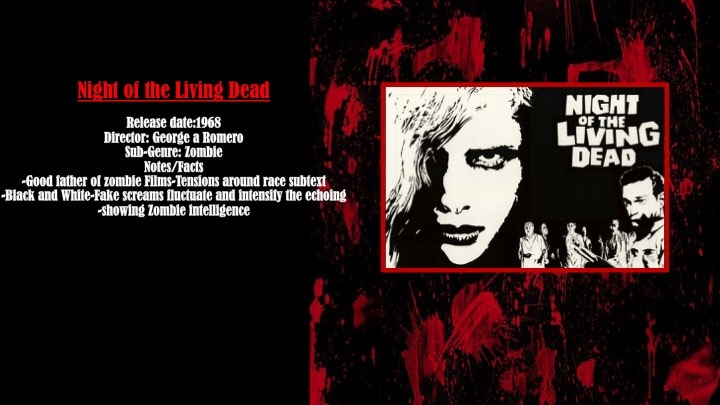
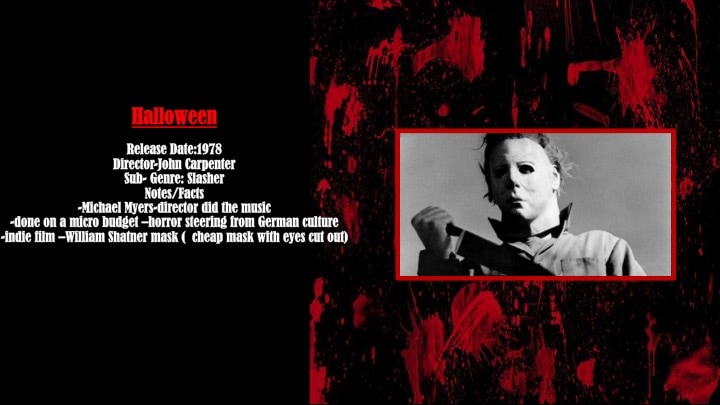
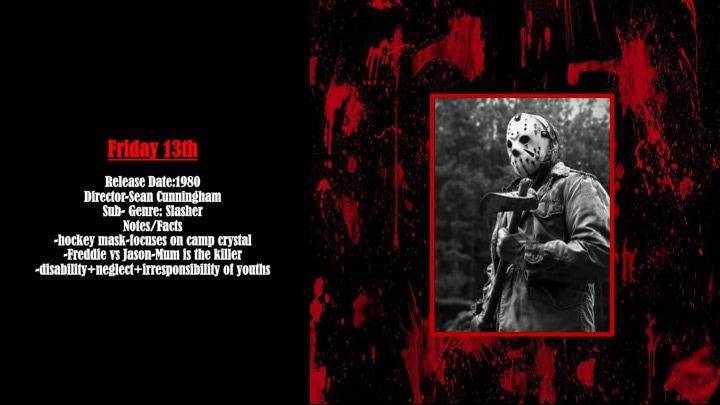
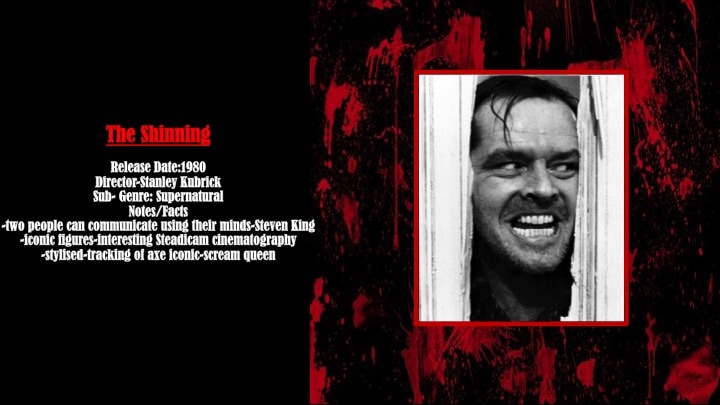
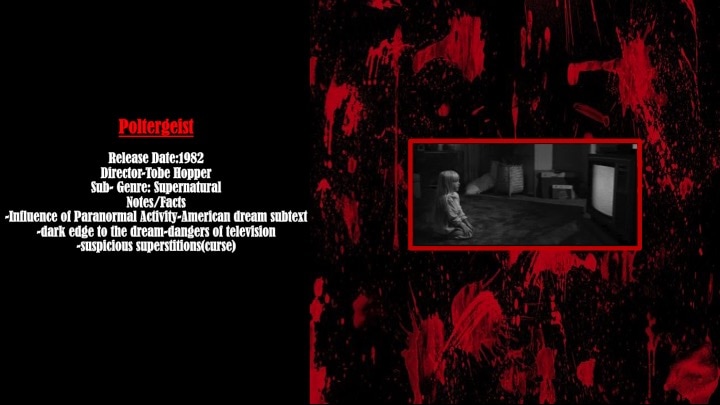
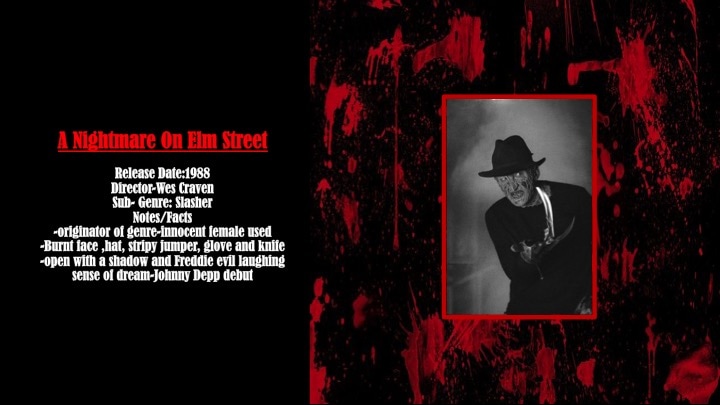
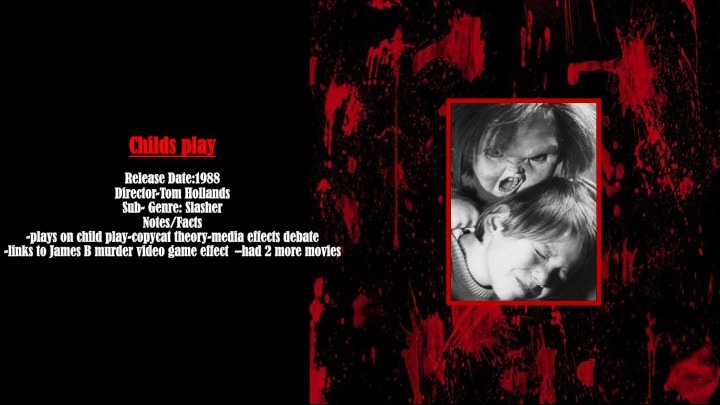
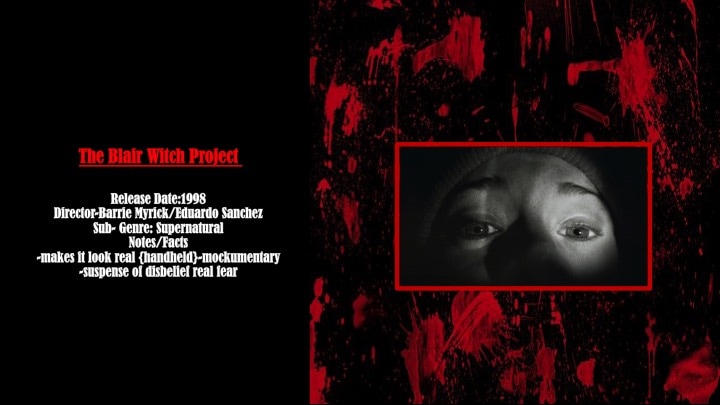
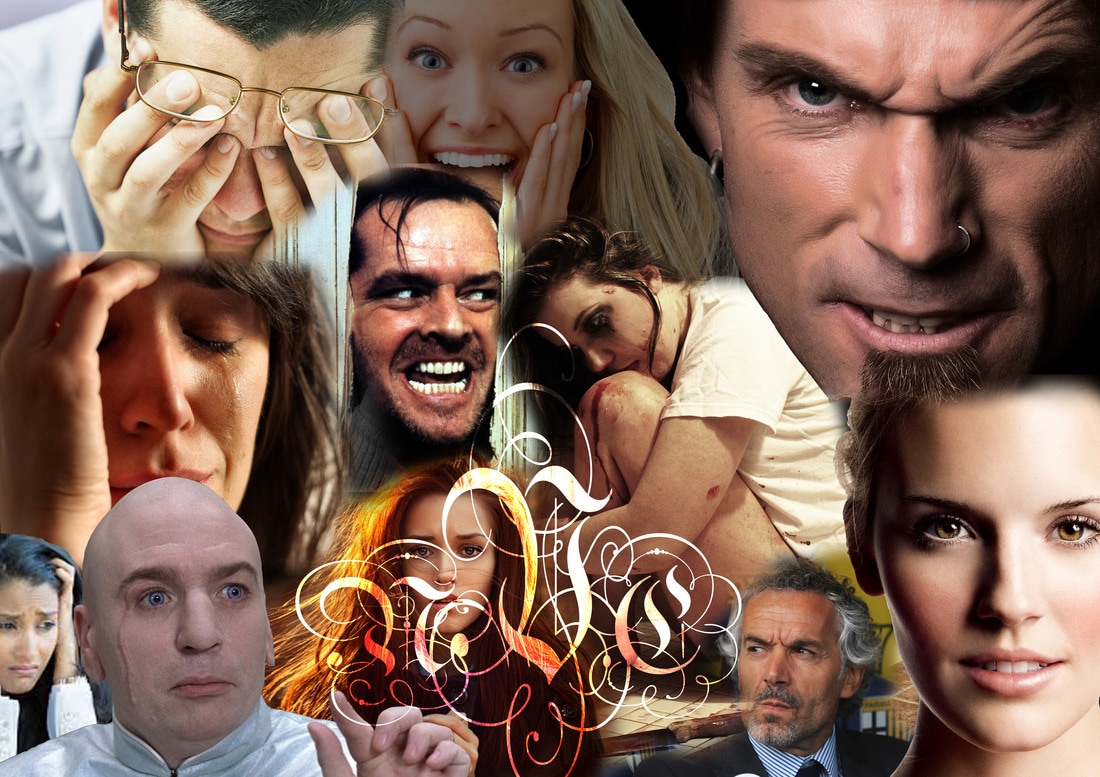
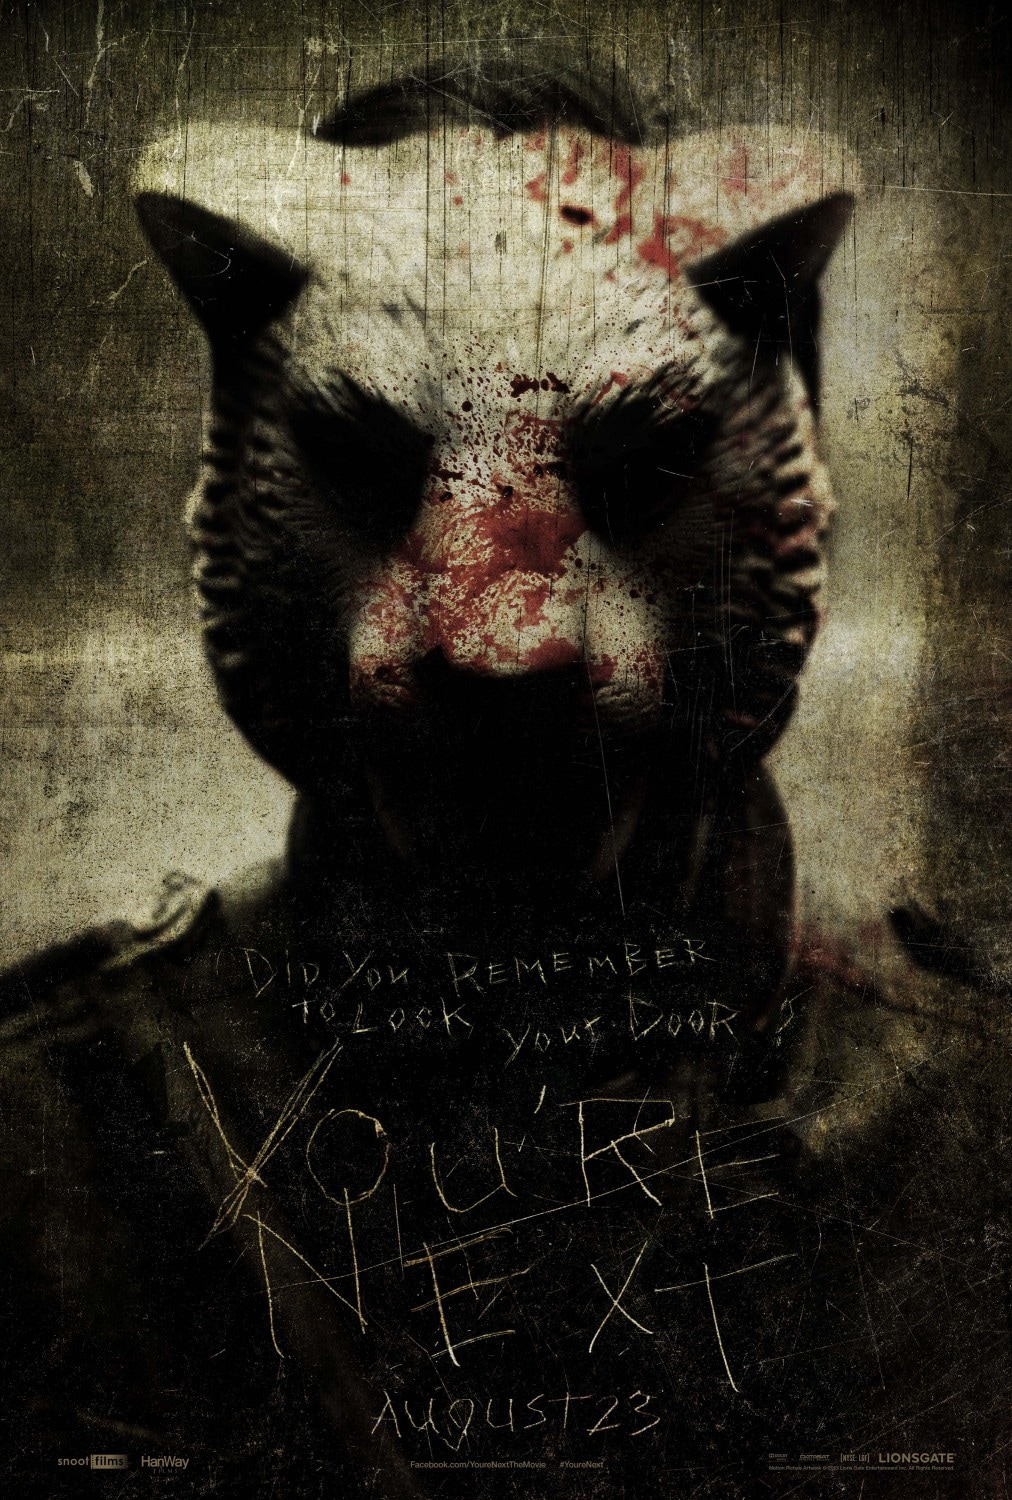
In order for us to gain inspiration from real media text we had to watch a wide range of horror movies to understand the media language that is needed so that we can class our trailer from a specific sub-genre and that being 'Slasher'.

|

|
|
|
|
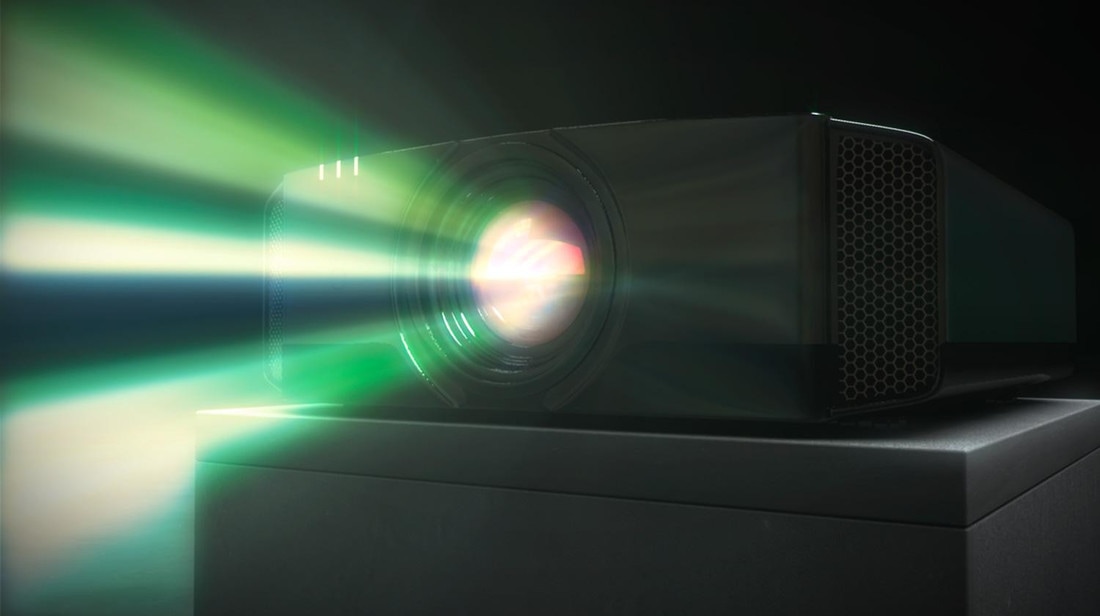
Having Netflix and the projector inside of college to watch these horror movies created two different atmospheres as when watching it on the project in a dark room it creates more of a cinematic feeling and its more scary. Whereas when watching it at home you have the choice weather to watch it in the dark or not but when watching it at home its more than likely to stay on your mind
|
|
CONSTRUCTION
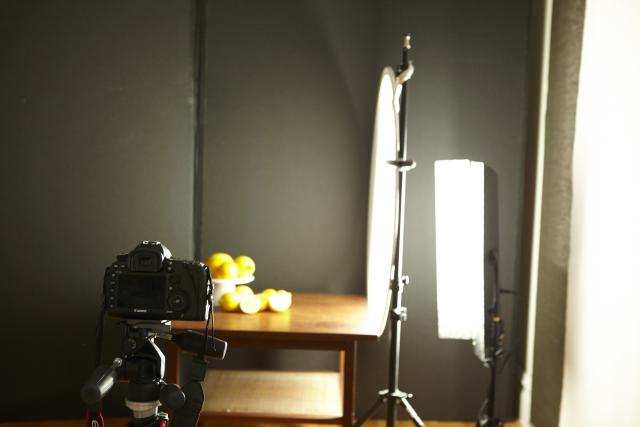
Camera Equipment
Canon 7D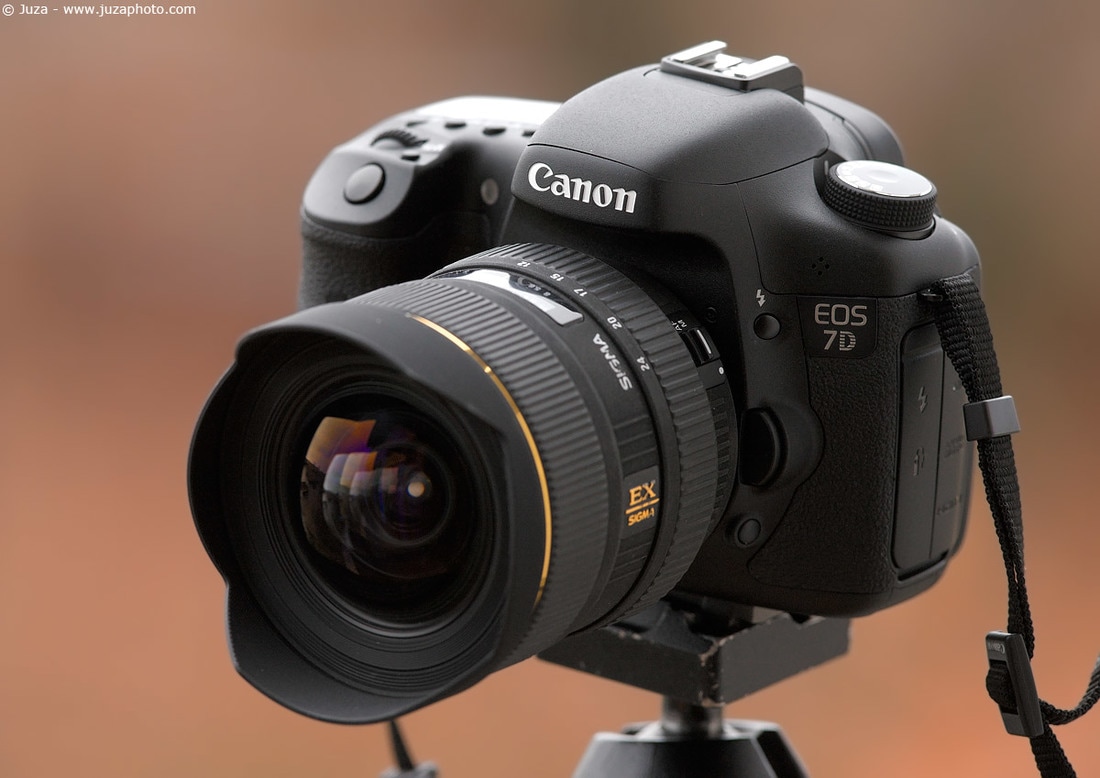
The EOS 7D has high performance. With 18 MP resolution it delivers brilliant quality and 8 fps continuous shooting keeps you ahead of the action.
|
Canon 600D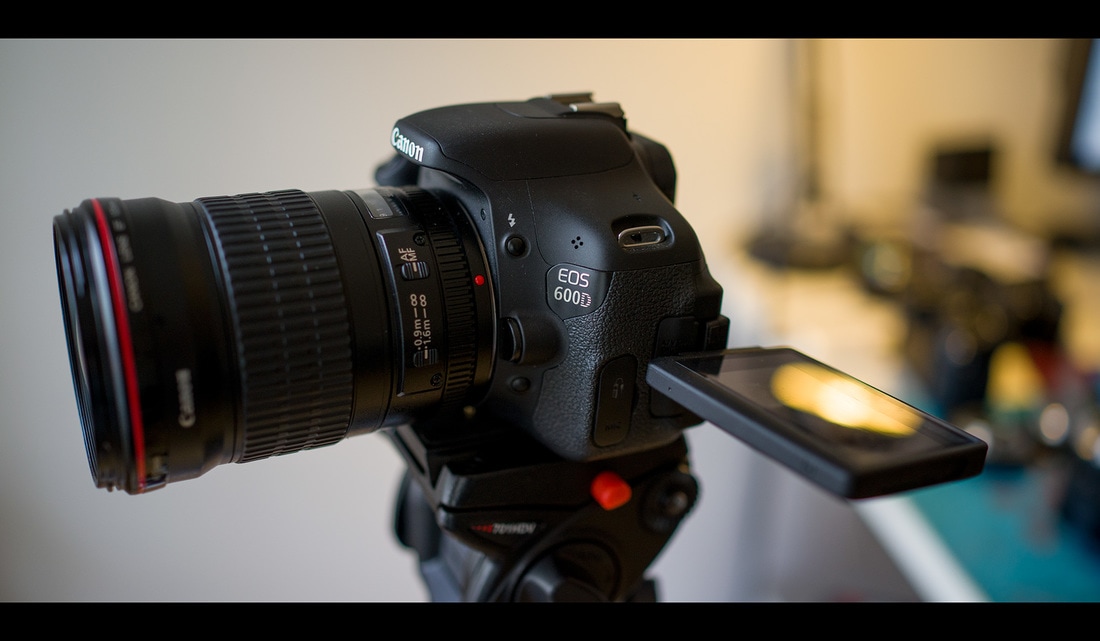
The EOS 600D has a user-friendly design, it also lets nothing stand in the way of your photography.
|
|


|
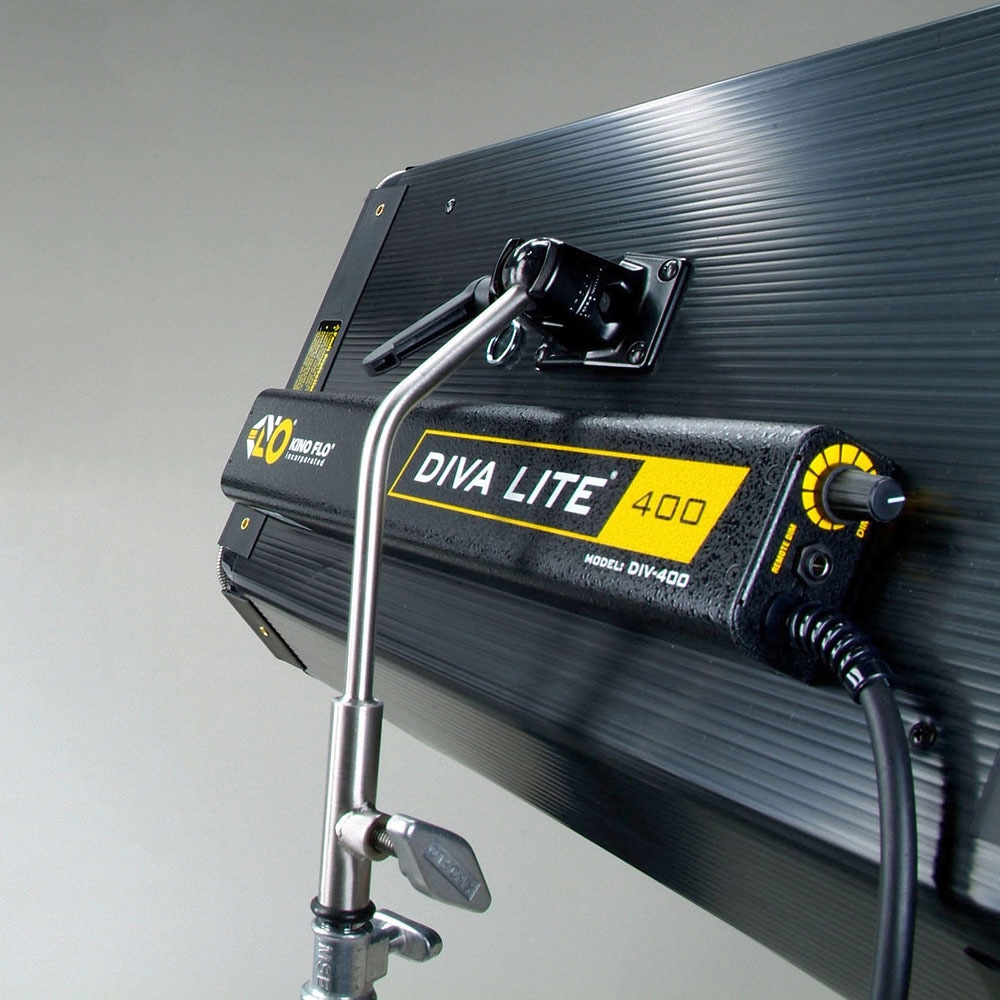
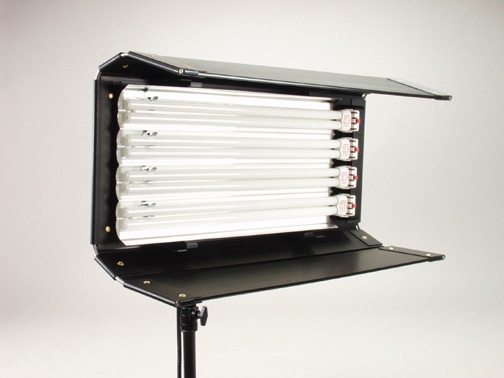
Kino Flo
|
|
|
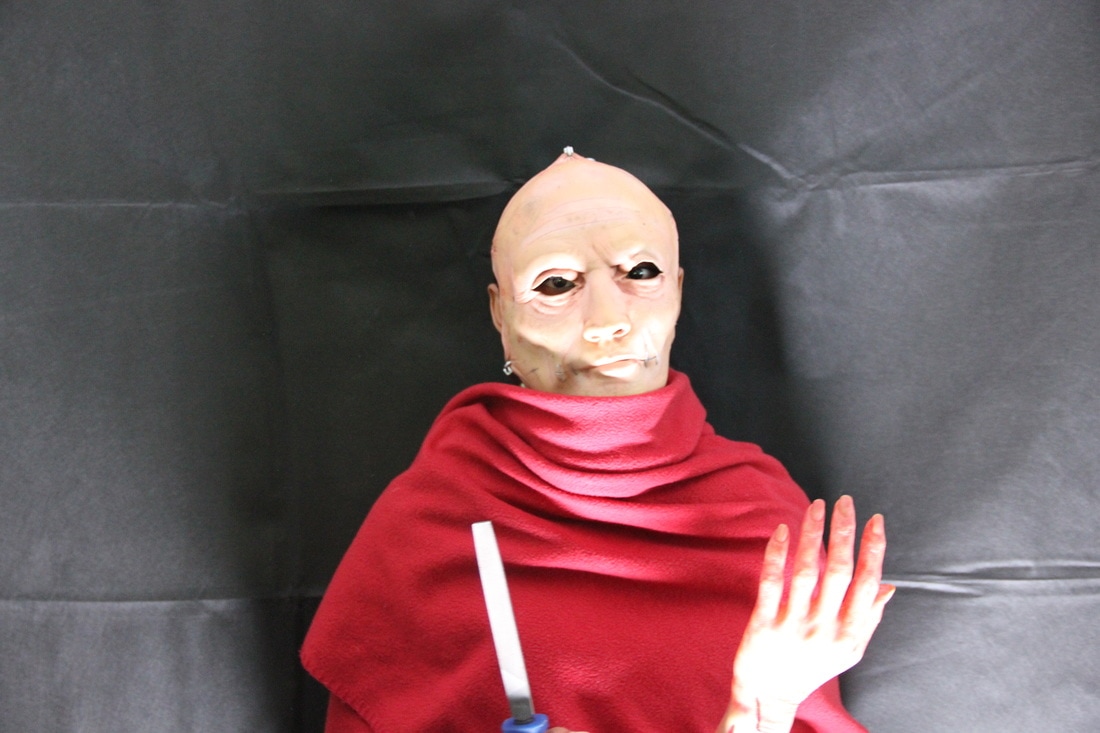
The Kino Flo lights are what helped us generate more light when filming our trailer in the house. Without the kino flo lights the shots taken would have came out a lot darker not enabling anyone to see the purpose of the shot. During the process of filming our trailer and taking pictures for our poster and magazine the lack of electricity is why we had to use hand lights instead of the kino flo in a lot of situations where light was needed. Although we had to work around that, we feel asif the quality of some of our shots could of been higher if we had used the kino flo at all times.
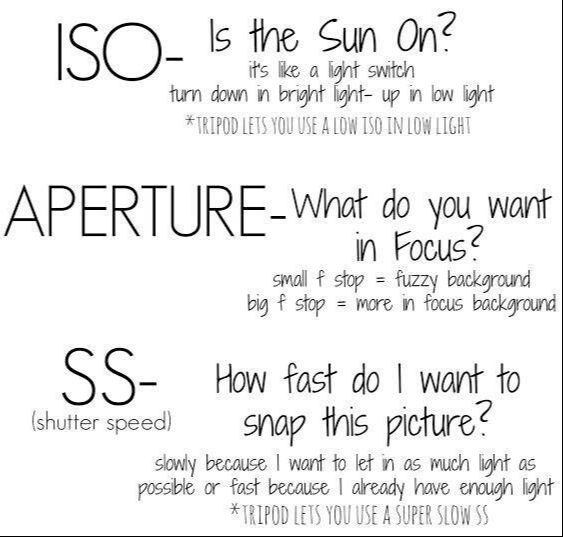
TEST SHOTS (Canon 600D)

|
|
These test shots not only allowed us to have a feel of what we may want the photos on our magazine and poster to look like but it also gave us a feel of the quality of the cameras that we would be using when taking the actual final photographs for our pieces.
|
|
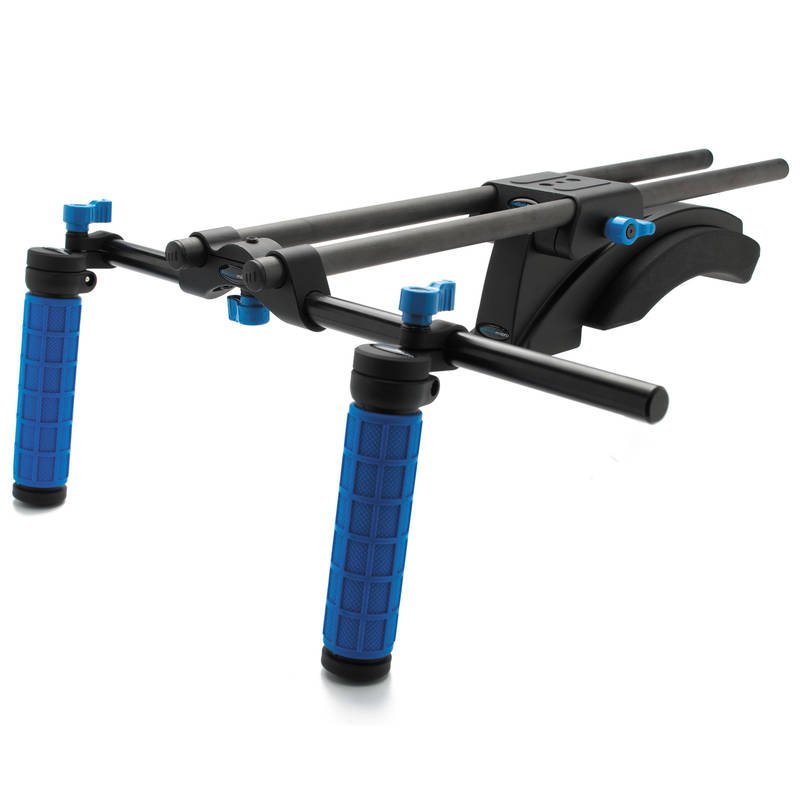
The shoulder rig was the most used piece of camera equipment on the day of filming our trailer. Not only did this help when trying to obtain a steady shot but it gave us easy access to move around although it was very heavy.
|
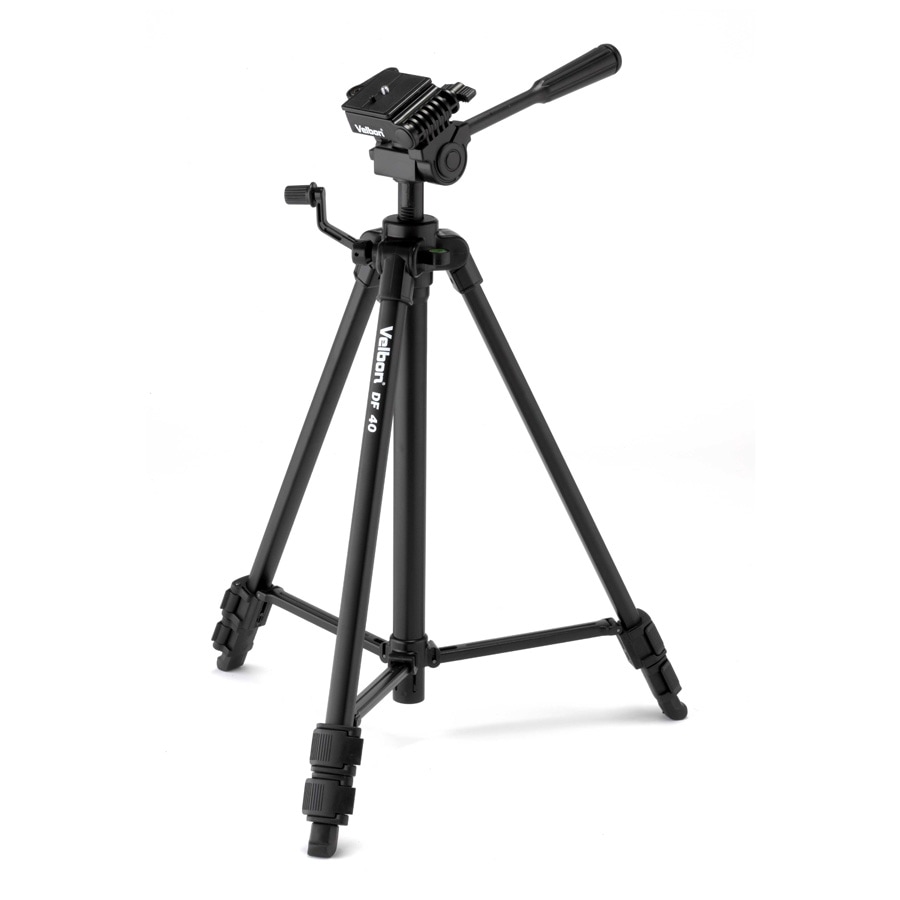
The tripod was used for the establishing shots and all of the shots that where still within our trailer. The reason for this is because we wanted to keep the camera at the same level at all times so the specific shots can catch the audiences attention without any distractions.
|
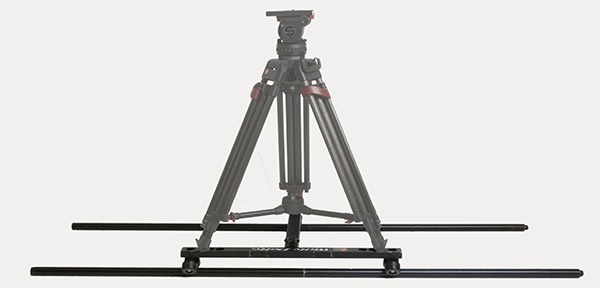
Having the track for our tracking shots was mostly useful because without it our tracking shots wouldn't have been as smooth as it was although we decided not to use it in our final trailer.
|
|
|
|
The videos above are examples of shots with and with the equipment used about. The purposes of producing these videos were to prepare our selfs for the different times of camera shots that we may want to us on the day of filming
POST PRODUCTION
|
In order to create our final products we had to use photoshop. With our brief experience with photoshop in AS we were able to use photoshop and manipulate our drawn drafts and digital drafts, that we used as templates, to create our final pieces. After partaking that bumpy round we met the deadline and created 2 final piece to a high standard.
|
Poster Template Drawn Drafts
|
|
|
|
Poster Template Digital Drafts
|
|
|
|
Potential Poster Typography Trials
|
|

|
|
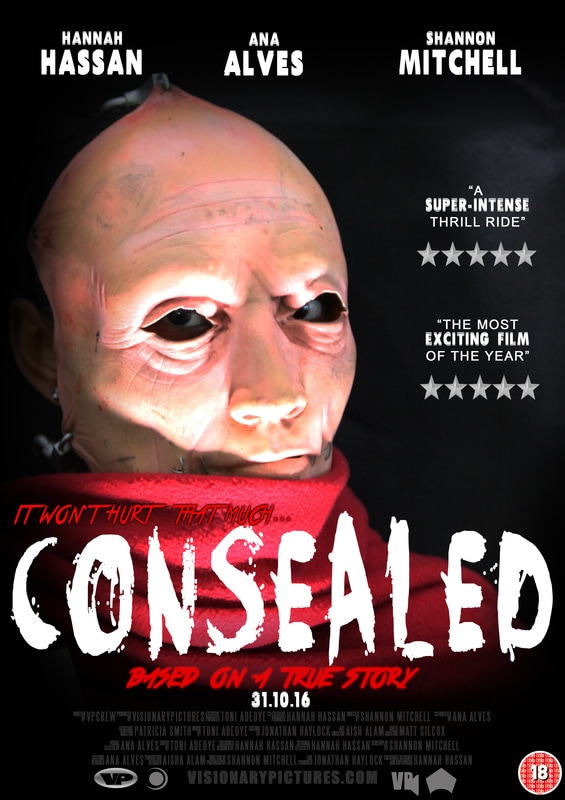
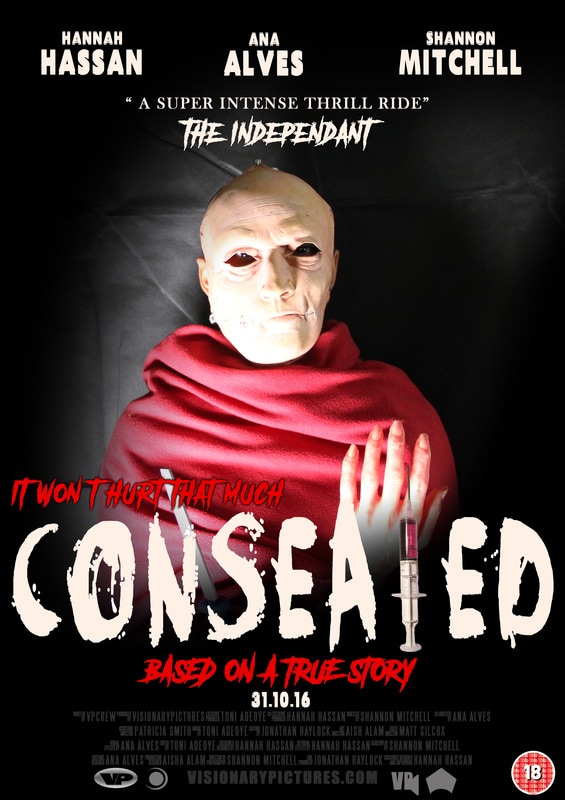
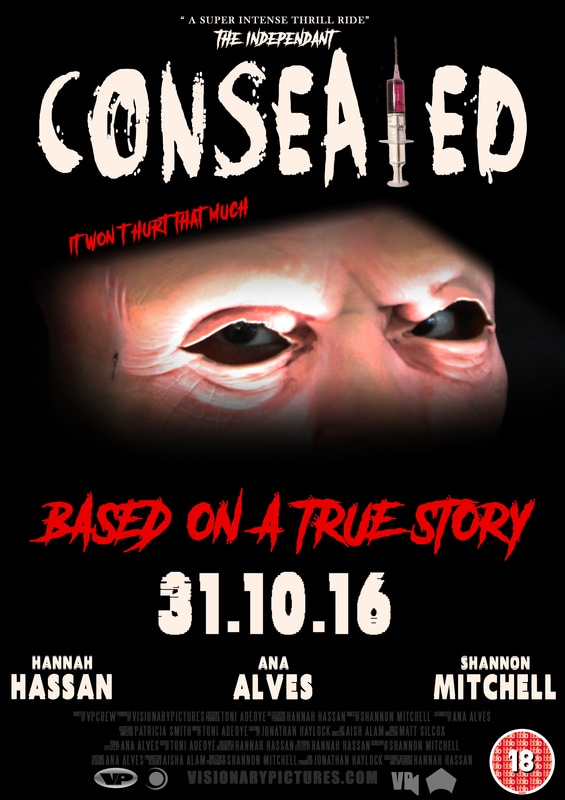
During the pre-production stages of creating our final piece in order for us to have a starting point, we began by doing drawn drafts of a possible poster for our trailer. This was then scan in after we all sat down at discussed the best possible way to portray our ideas. Once is was scanned in we used Adobe photoshop to digitalise the different layout so that when we start creating our poster there would be a template already there so that we didn't have to waste time contemplating what should go where. Finally we tried out different shots that we could possibly have so we could have a rough idea of the composition of our final poster.
Poster development
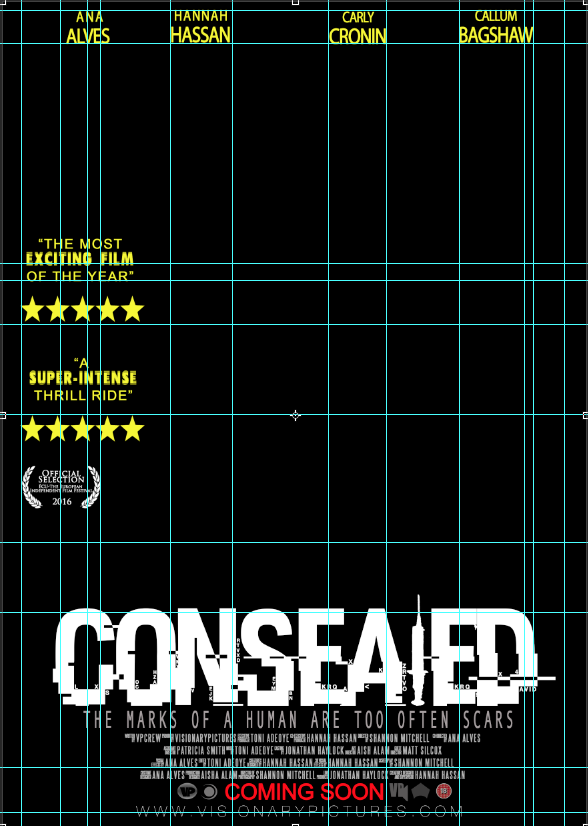
This is the layout that we began with. The guide/rulers are used so that everything is in line and in the correct places.
|
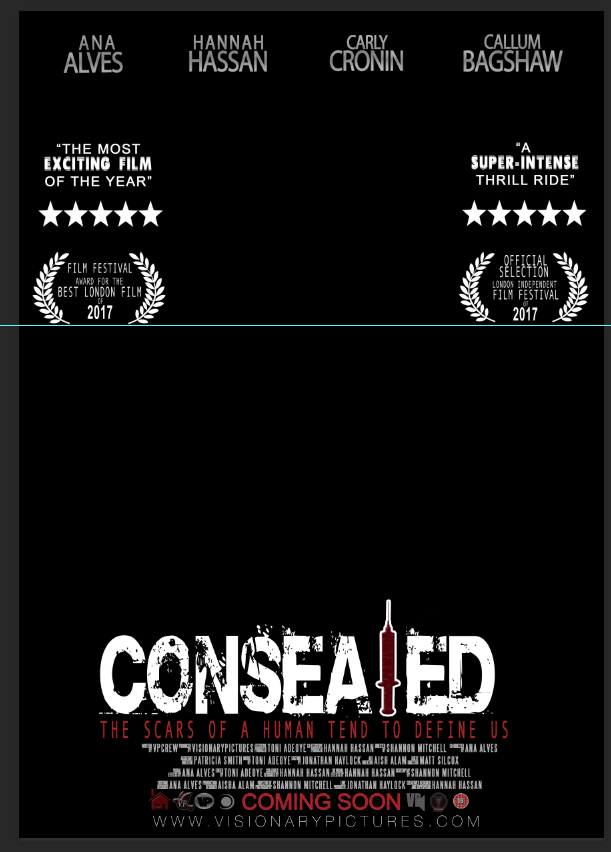
We then went onto getting the correct layout with our new font has we had to change it due to another group having the same.
|
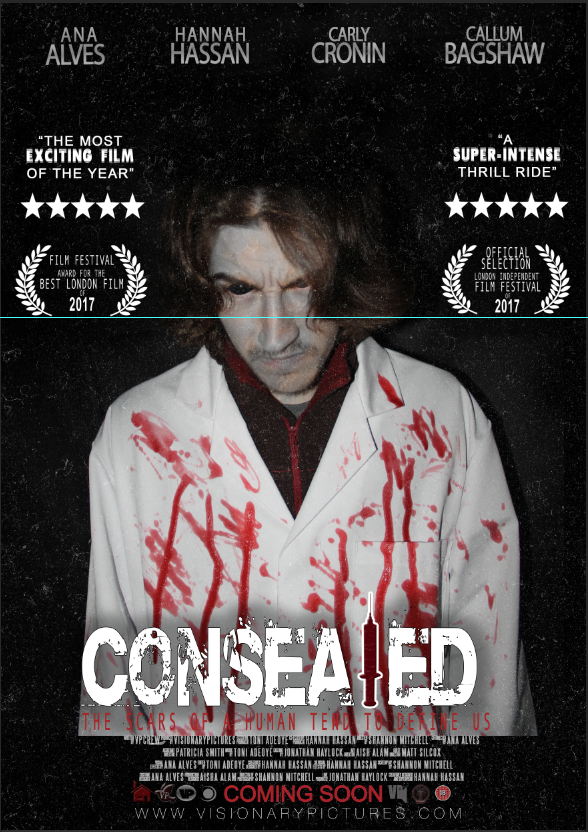
We then imported the main image we wanted adding drops of blood onto his lap-coat to emphasis on the damage he causes.
|
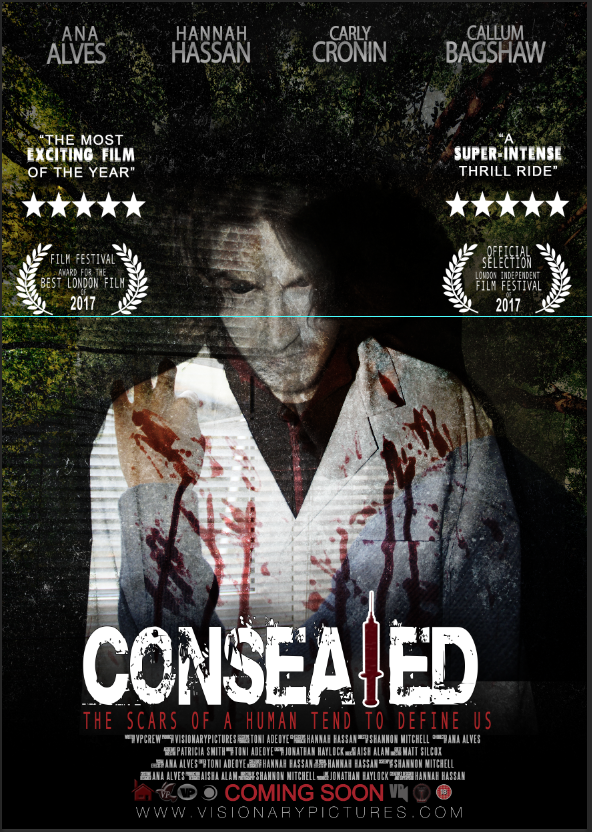
Adding layers of textures to make it more interesting and allows it to have more of a horror feeling instead of being plain.
|
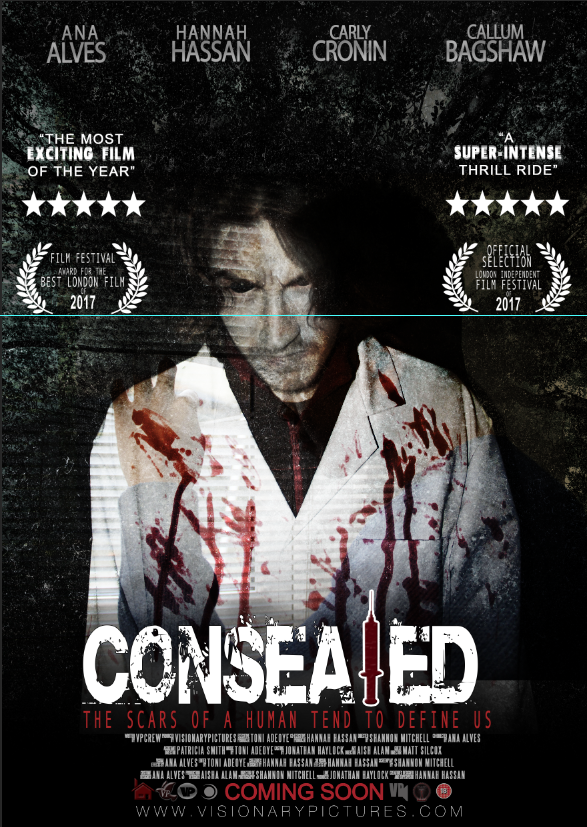
This stage of the poster is when a tint of blue has been overlaid and the opacity has been turned down so that it isn't overbearing.
|
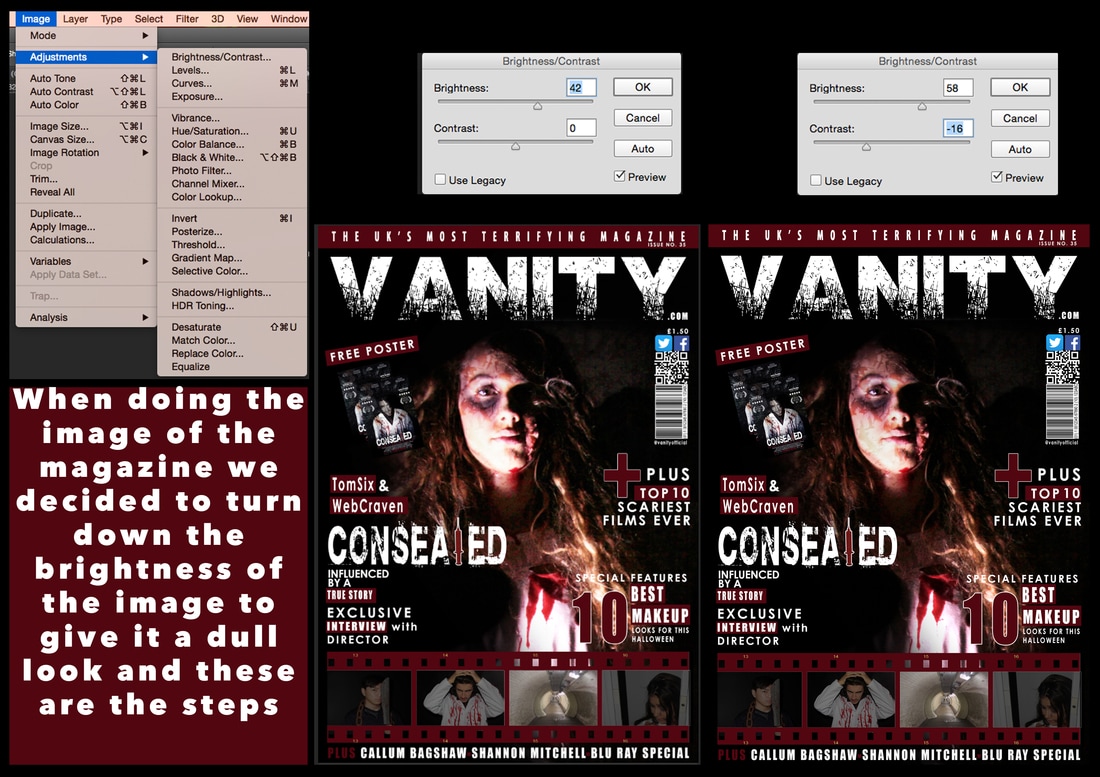
Last but not least all the brightness and contrast has been altered so that everything blends and matches.
|

Magazine Template Drawn Drafts
|
|
|
|
Magazine Template Digital Drafts
|
|
|
|
Potential Magazine Typography Trials
|

|
|
|
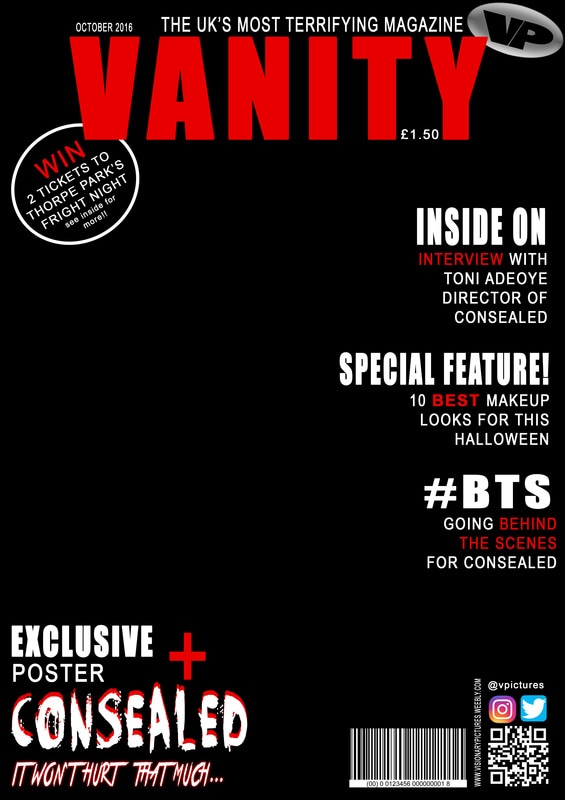
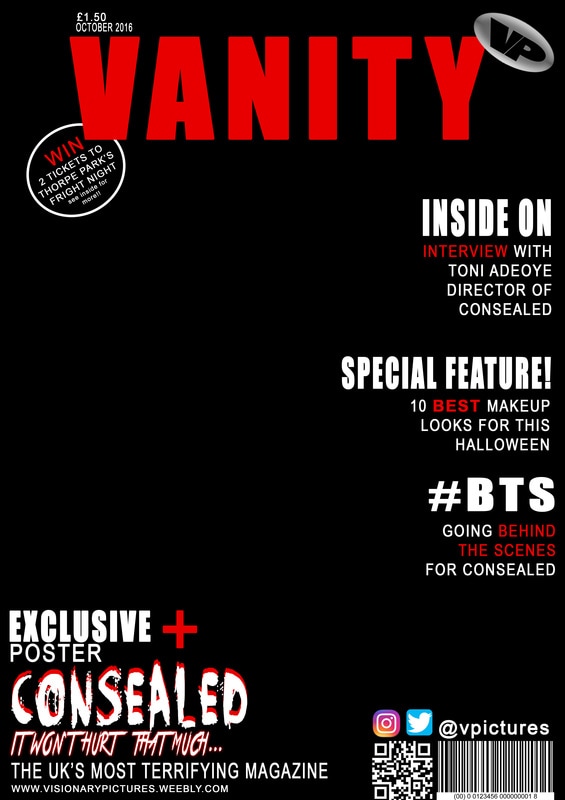
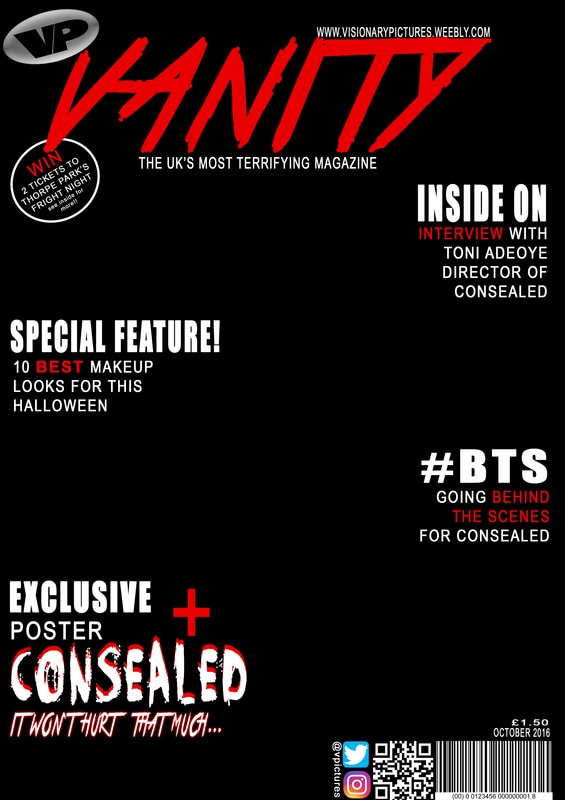
After following the same steps of the poster for the magazine we then went on to writing up the cover lines for our final magazine. The purpose of this was to have them ready so that when creating our magazine we just had to manipulate the picture to our liking and possibly change the composition of the magazine. Although we then went on to adding a strip when creating the final product these are the template examples that we went with to create it.
Magazine Development
We began our poster again with the font of the title. We then added the main image.
|
We when started adding coverlines and drawing rectangles to make it stand out on top on the image.
|

After adding all the cover-lines we then added a film strip with images from different horror trailers within the year.
|
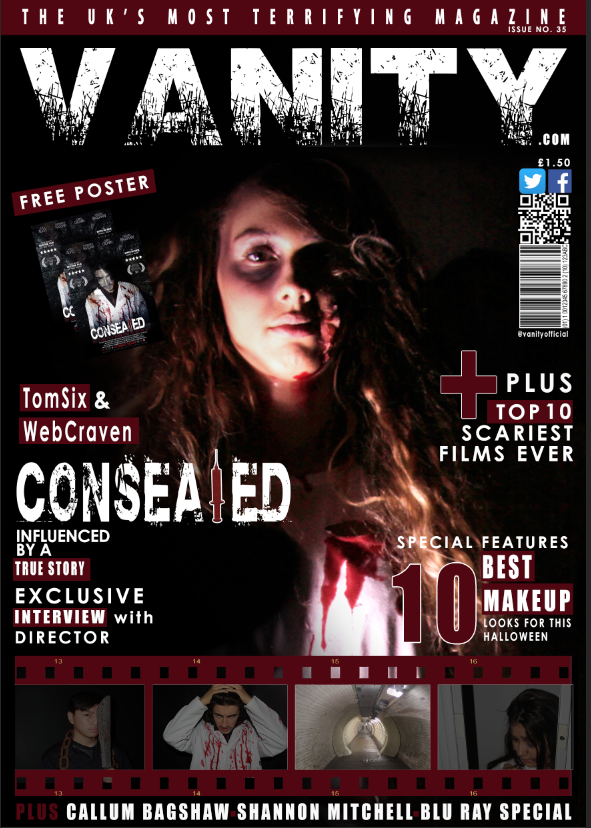
We added a free poster sign with the selling line located at the top of the magazine so that it can stand out to buyers.
|
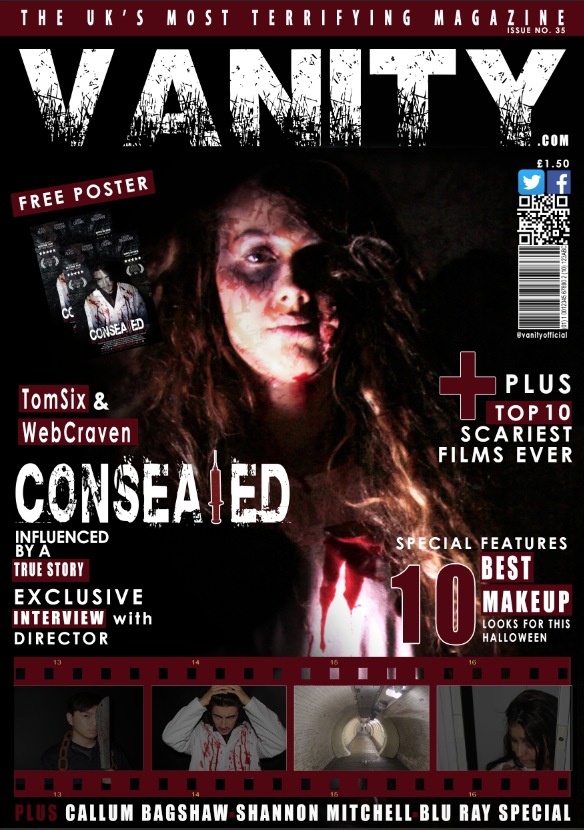
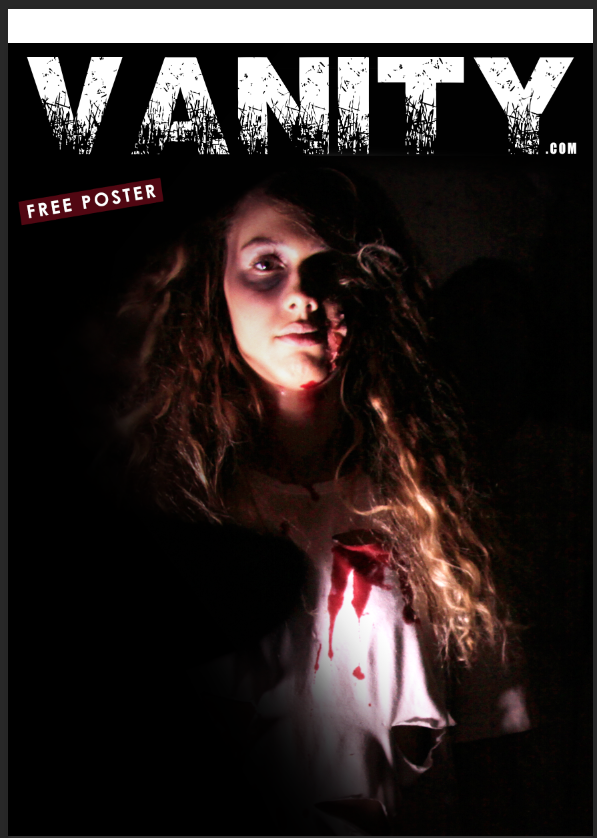
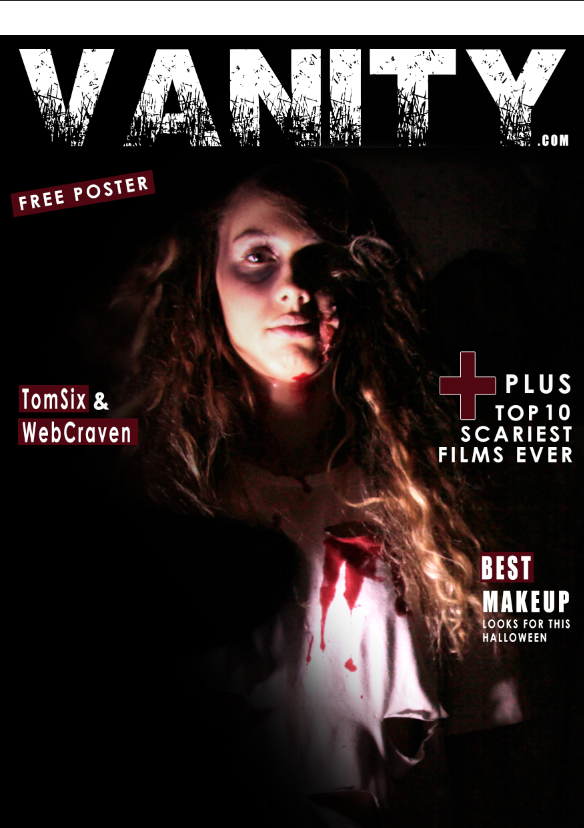
Finally we added a layer texture for the main image which resulted to her looking as if her face was a mirror that shattered.
|

|
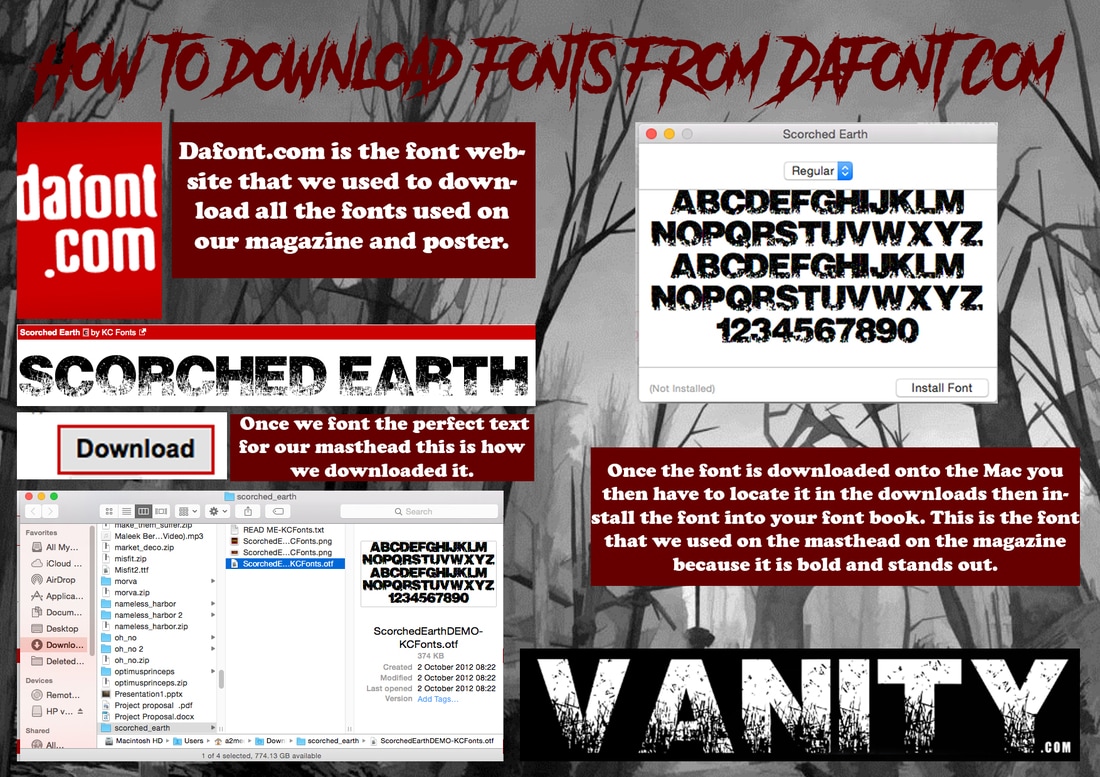
Dafont.com was the font site that we used to download all our fonts for the creation of the Poster and Magazine. This was a free site that we were able to used only in the MAC room when creating and changing our fonts this is because unfortunately at the last minute we had to change how font as another group had the same one and it fit their criteria more than it fit ours. |
Brightness and Contrast
|
Adobe Premier Pro was the software used for creating our trailer. This software enabled used to put together our footage and manipulate it in any way we want. The software allowed us to import any sounds we wanted and adjust it to the correct volume at the preferred time. Although we had no previous experience using Adobe Premier with mild guidance we learnt our way around using it and being about to be in charge of the outcome of our trailer.
|
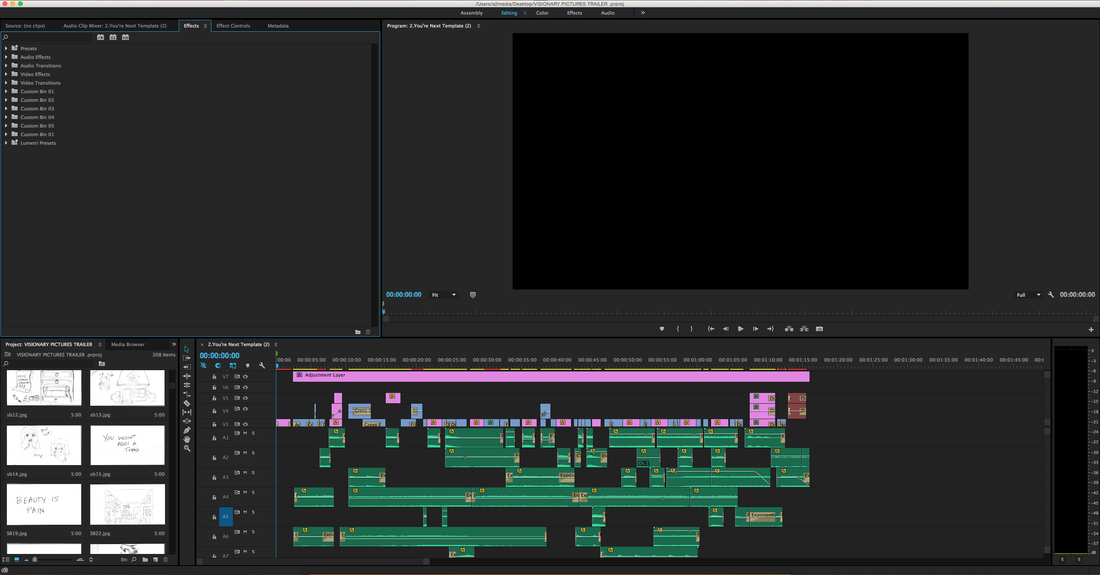
Premier Pro layout
|
|
The screenshot above is the layout of Adobe Premier Pro once our trailer was all finished with the sound included as well.
|
|
The Canvas
The canvas is where all the effects are kept for us to be able to access them. We were also able to edit the effects with the effect controls.
|
Project Panel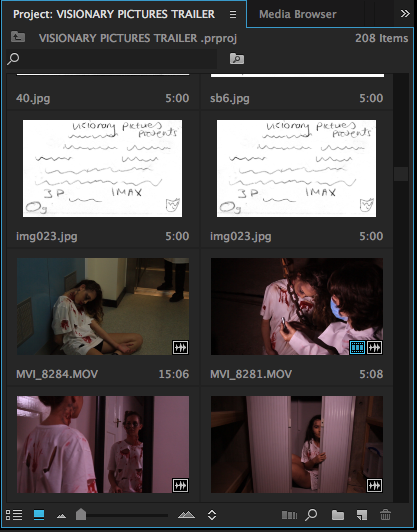
The Project panel is where all of our imports footage and images for captions are kept for easy access.
|
The sequence
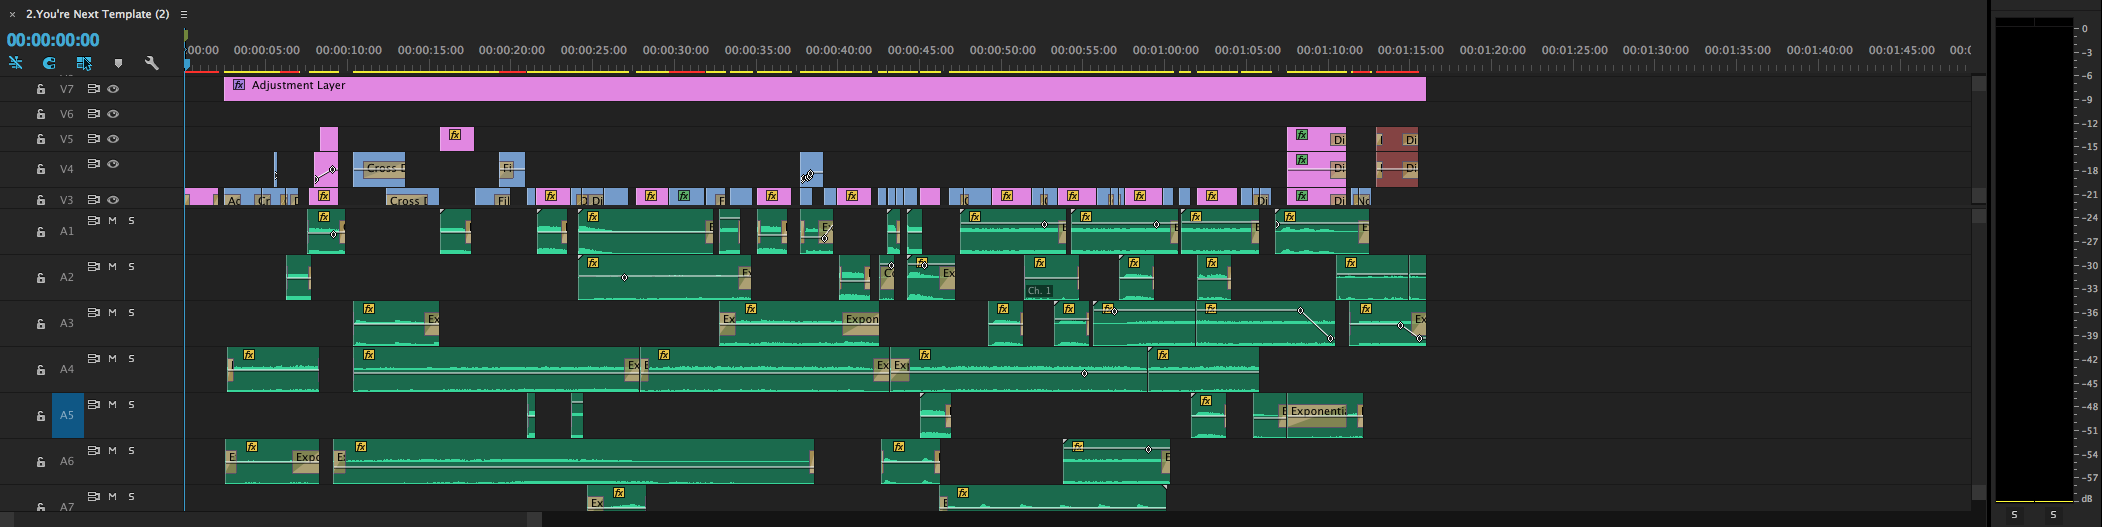
This sequence is all of trailer with the effects and the sound effects as well. The sequences is the only place where you are able cut and place the imported footage in. This is also where you drag the effects onto the footage pieces and the sounds to alter it in the effects control when needed.
The effects
The effects are all available at this part on adobe premier. This includes effects for audio, video and the transitions needed for the both of them. This was vital for the creation of our trailer to look smooth and not be staggered.
|
Tool box
|

Adding titles
|
The first step was to add the title and save it to the project panel. Then using the type tool you can type anything that you want. After everything you want is typed you select the hand tool and drag the text to any where on the screen. Once that is done then you have to find the image in the project panel and drag it on the sequence and then you use the razor tool to edit it to any size frame you want. |
|
Exporting the Trailer on Premier Pro

|
Step 1: Go to file on premier pro
Step 2: Export media Step 3: View the export options Step 4: Select the MPEG4 option so that you can export it in best quality Step 5: Press export Step 6: Wait until the clip is loading to 100% and then its exported into your documents |
Adding transitions example
How to create a Glitch Effect
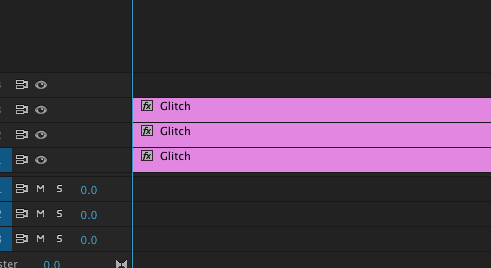
The first thing to do is drag 3 of the same image or video to the sequence and place the directly on top of each other.
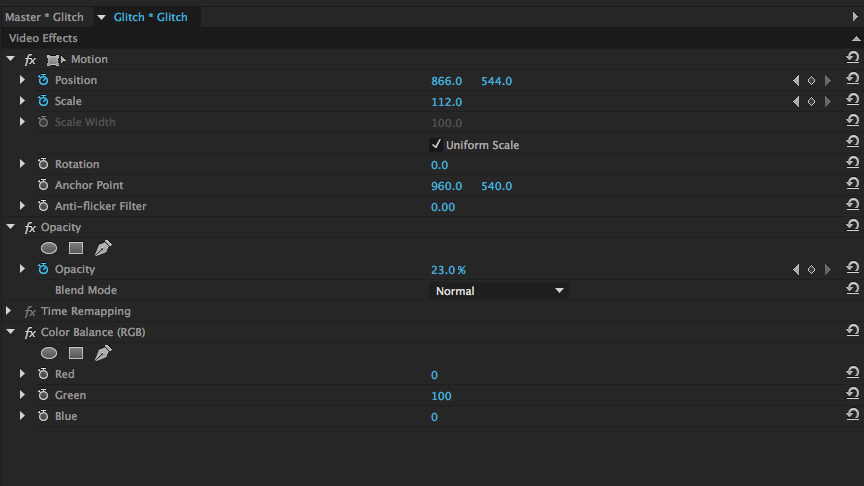
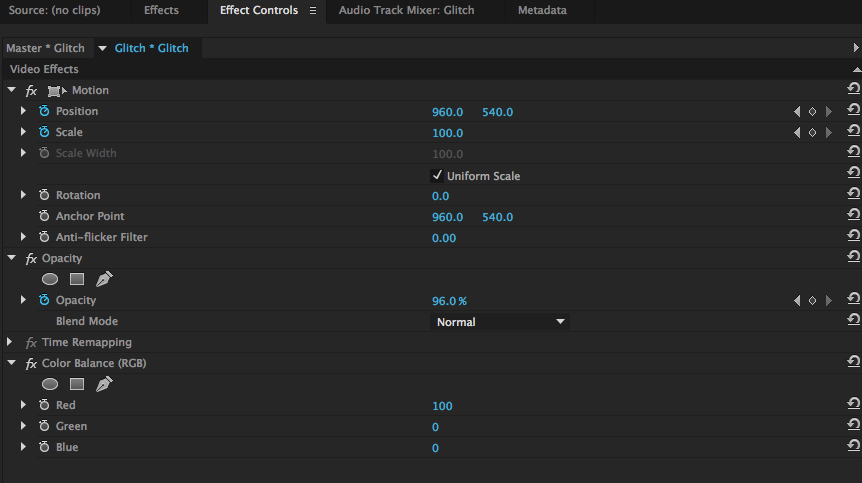
After selecting the second glitch on step one you then have to change 'green' to 100 and 'red' and 'blue' to 0. You also have to turn down the opacity on this as well.
|

Once that this done you then need to go to the effects and then search 'colour balance (RGB) which allows you to change the colours on the image.
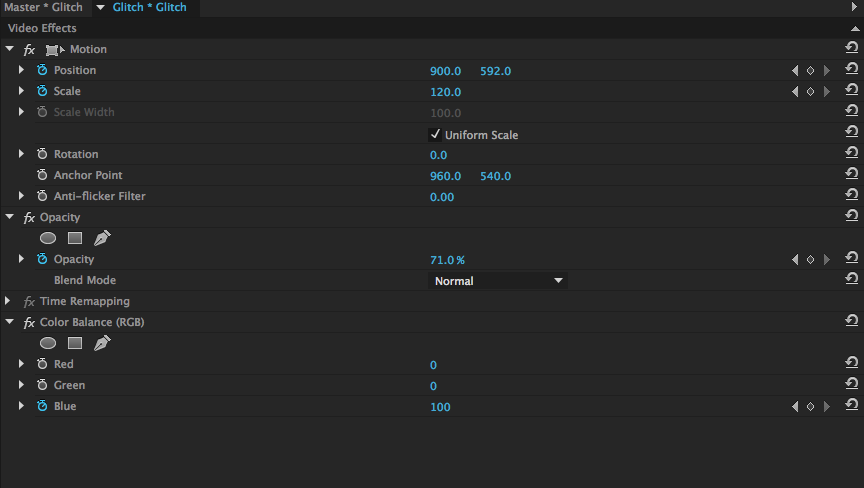
After selecting the third and final glitch on step one you then have to change 'blue' to 100 and 'red' and 'green' to 0. You also have to turn down the opacity on this as well. On this step you have to make sure all the positions and scales are marked on thee motion so that you are able to change them.
|
After selecting one of the glitch images from step one you then need to turn down the opacity and then change the colour 'red' to 100 and 'blue' and 'green' to 0

Each 'Glitch has a different set of positions and scales so that it can move around and be seen as a glitch on the effects and thats all the steps on how to create the glitch effects
|
|
|
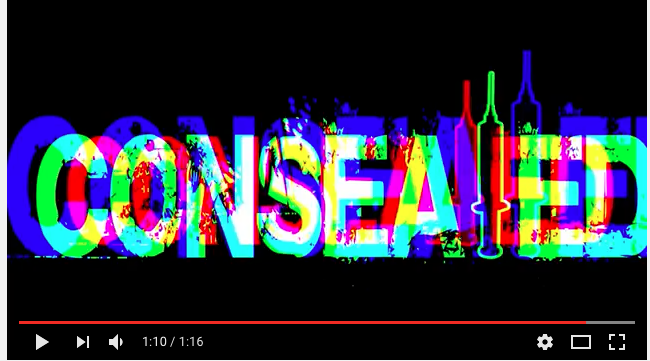
The glitch effect was used for our film title in the ending of the our trailer. This effect shows our creativity in making our trailer stand out from the others.
|
|
Sound
|
|
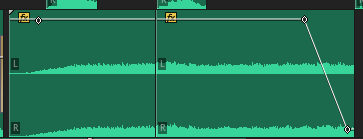
The video about are the steps that we took to add the effects of exponential fade. The reason why we feel the need to show this is because the is one of the sound effects used most in our processes of created the sound to fit the trailer.
|
|
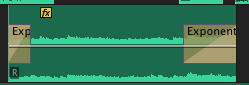
This screen shot is how the exponential fade effect looks once placed on the sound. This also shows how sound is very low before being edited.
|
|


|
This is the original sound that we used for our animatic to get the pace of the trailer flowing
|
We then put together a storyboard that involved all the shots that we wanted for our final trailer with the sound template of 'You're next 2014'
|
This is our final trailer that was made from the animatic sizes that altered to make it flow more.The were also adjustments made for the final piece.
|
Conclusion
In conclusion the use of different media technologies was very important in the process of creating our final pieces and recording each step leading up to it. Using Weebly was an effective website to store all the work done in Development, pre-production and production stages as its easy to access for the viewers and for us to fix and edit it. With loads of help from the internet we were able to gain information from real media text t influence of our products and gain knowledge of the conventions for horror slasher movies. The Apple Mac was the home for all the softwares used such as Adobe premier pro and photoshop, quicktime to do all the screen recording within the evaluation process. These softwares not only aided us to complete of final products but it helped improve our overall skills for the futures in these softwares.
